
For more specialty coffee knowledge, please follow: Front Street Coffee (Frontsteet Coffee)
Latte art almost always uses Espresso as the base, and when brewing Espresso, there are actually tricks to make it more suitable for latte art. So, which coffee beans are better suited for latte art? Front Street is here today to give the answer.
Recommendations for Choosing Latte Art Coffee Beans
To create perfect latte art, we first need to extract an Espresso with rich but moderate crema, so that the foam layer can blend better with the milk, and the latte art pattern will be more stable. Based on Front Street Coffee's experience, choosing medium-dark roasted Italian-style coffee beans is very beneficial for this.

Here are a few coffee beans highly recommended for practicing latte art. They not only have a rich aroma but also pair with milk for a balanced and smooth taste, making them an absolutely perfect match for milk. If you like nutty flavors, we recommend Front Street Specialty Italian Blend Coffee Beans and Front Street Colombia Huila Coffee Beans;

if you like rich crema, we recommend Front Street Classic Italian Blend Coffee Beans; if you like caramel and spice notes, we recommend Front Street Golden Mandheling Coffee Beans.

Besides choosing the right coffee, we also need to pay attention to the freshness of the beans. Overly fresh Italian-style coffee beans contain a large amount of carbon dioxide, producing relatively thick crema that is not conducive to latte art, so they need to be rested for 5–7 days; stale Italian-style coffee beans, on the other hand, lack sufficient carbon dioxide, so they cannot produce enough crema and it appears thin, unable to blend with the milk foam. Front Street recommends using coffee beans with a roast date within 7–45 days to make espresso. Precisely because we know how important freshness is to coffee flavor, Front Street has insisted for years on shipping beans roasted within 5 days, ensuring that everyone can enjoy the full flavor window of the coffee after receiving it.
Three Major Learning Methods for Latte Art
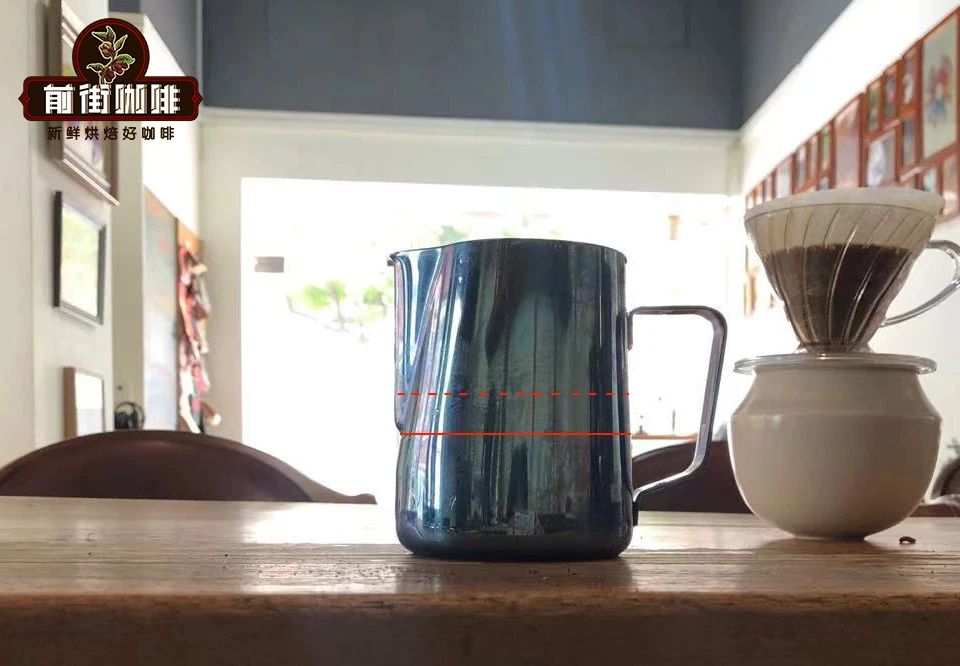
11. Milk Pitcher and Milk Amount
If your milk pitcher is 450ml, then you can use about 200-250ml of milk; if the pitcher is 500-650ml, then the amount of milk used is about 300-350ml.
22. Open the Steam Wand to Release Air
Before steaming milk, release some steam first, mainly to clear out the condensed water inside the steam wand.

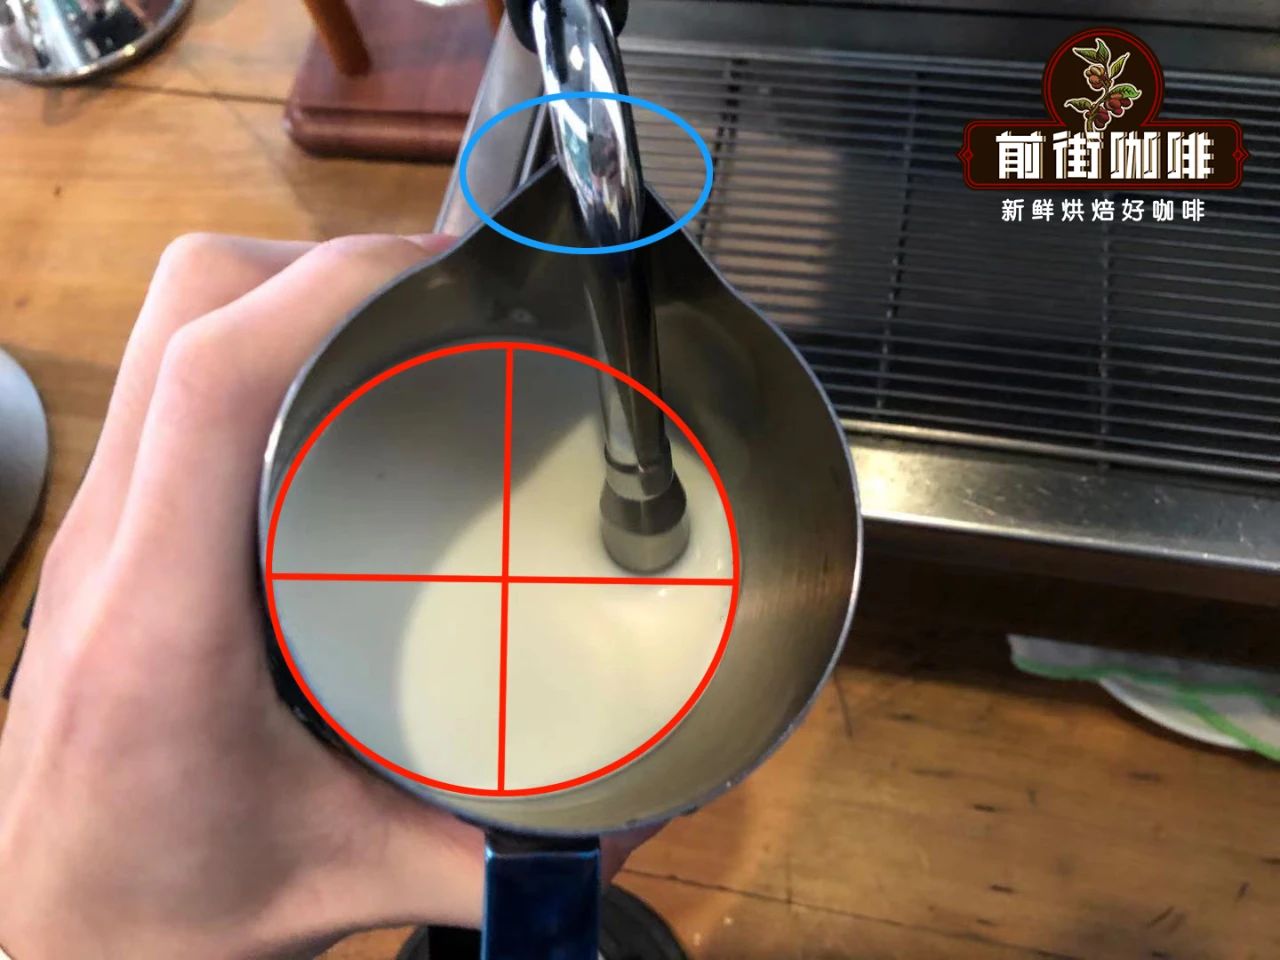
33. Angle of the Milk Pitcher
Place the steam wand's steam tip toward the 2-3 o'clock or 9-10 o'clock position. Insert the steam wand's steam tip into the milk at about 2/3 depth—not too deep, and do not let it touch the walls or bottom of the pitcher; nor too shallow, otherwise large bubbles will keep forming on the surface.
44. Steaming the Milk
Pull surface air into the milk to form foam. At this time, you will hear a "hissing" sound of air intake (if after opening you hear a harsh screeching sound like a pig being slaughtered or no sound at all, it means you are not in the steaming process).
55. Texturing
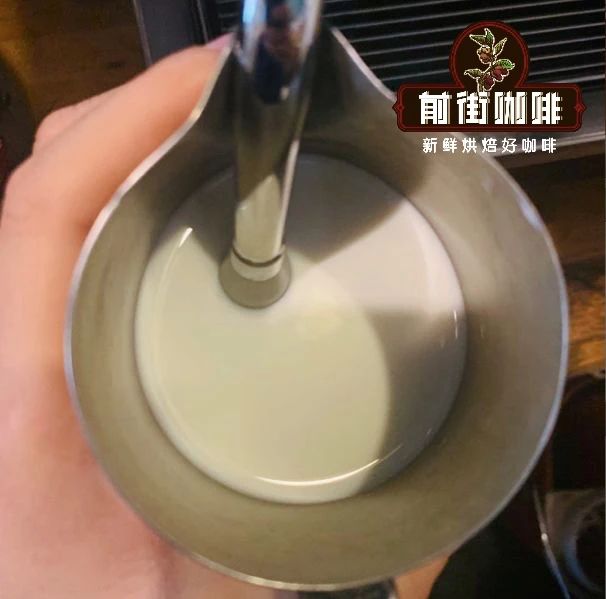
Eliminate large bubbles and separation through a vortex. By adjusting the angle between the steam wand and the milk (not the contact point), make the milk form a 【vortex】 in the pitcher, and through the 【vortex】, tear and pull apart the foam generated during steaming, breaking large bubbles into fine bubbles, and blending the upper foam with the lower milk.
Stop the 【steaming】 process at the right time. After the milk temperature reaches 55–65°C, turn off the steam and then remove the steam wand.

66. Tap the Pitcher After Steaming.
The purpose is to pop the residual large bubbles on the surface of the milk foam, making the surface look smoother and finer. Once the milk foam is ready, we officially begin latte art. This time we will use a big white heart as a demonstration.
① Lower the milk pitcher close to the cup and start pouring from the center of the liquid surface.

② While the left hand straightens the cup, the right hand's pitcher increases the flow rate and slowly straightens as well. At this point, you will see the milk foam float on top and slowly form a circle that gradually expands.
③ When the cup is almost at a 180° angle, the foam circle has already taken shape. Raise the pitcher in place while reducing the flow (be careful not to push forward while raising), using the downward impact of the flow to press the upper layer of coffee liquid downward. At this point, you will see a heart-shaped indentation appear in the original circle, with the flow from both sides converging toward the center.
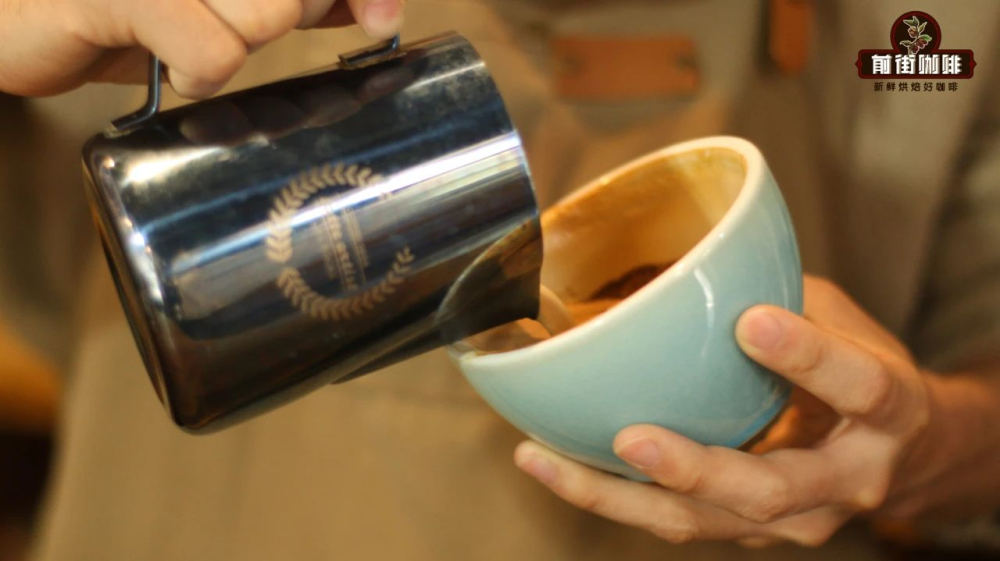
④ Once the heart-shaped indentation appears, you can push forward, and the pointed tail of the heart will come out.

⑤ And just like that, a solid heart is born.
The above content is compiled by CoffeeHunters, a coffee news website.