
As coffee has become part of everyone's daily life, it's not hard to learn a lot of new and comprehensive knowledge about coffee from video apps. Besides researching how to brew and how to taste the flavors, quite a few people have started to develop a strong interest in coffee bean roasting.
But many people act on a momentary impulse, and after buying green coffee beans they don't know how to roast them. Below, based on Front Street Coffee's own practical experience, we'll introduce ways to roast coffee beans at home.
Taste differences among coffee bean roast levels
When roasting at home, you must use low heat at the beginning, then adjust slowly later. No matter what tool you use, you must keep stirring the coffee beans! At the same time, pay attention to observing changes in the coffee beans' color! If the coffee beans' color changes quickly, but the change is not uniform overall, this indicates the heat is too high or the stirring frequency is not enough. If you feel the stirring is already adequate and there is no room for improvement, this shows the heat really is too high! When this happens, you should immediately turn the heat down and move the pan away so the temperature inside the pan drops quickly! After it drops, put it back on the stove with the heat already adjusted and continue heating and stirring.
If the coffee beans' color does not change for a long time (3, 5, 10 minutes, or even longer), it means the heat is too low. In this case, you should appropriately increase the heat. If the coffee beans' color changes slowly, and the change is uniform and overall, this shows you have grasped the heat very well! In this situation, while paying attention to the coffee beans' color, you can also listen to the sound of the coffee cracking.

As roasting continues, the beans' color slowly changes from the initial pale green to yellow, then to brown, to dark brown, and finally to black. During this process, in the change from yellow to brown there is one crack, but this cracking process is very short and sometimes not very obvious; sometimes it ends after just 3-5 sounds. This is first crack.
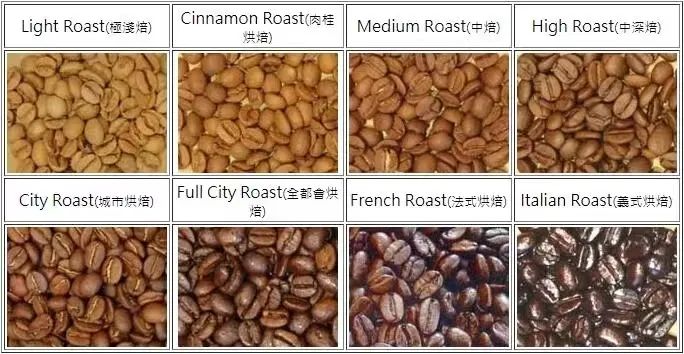
During the change from brown to dark brown there is another crack. This crack lasts as long as 2-3 minutes, or even longer, with a very high frequency of sounds, crackling like firecrackers! This is second crack. Second crack is very easy to notice. Generally, when second crack has just begun, that is, after hearing about 10 or so sounds, if you stop the heat at this point, the beans you get are medium roast - full city roast.
Bean characteristics: the bean surface is dry, has not yet released oil or has released only a little oil, and there are tiny black spots on the brown bean body! As the sound of second crack continues, the roasting of the beans also deepens. When there is completely no sound, that is, when second crack ends, the beans are basically black and severely carbonized.

Of course, this is also a roasting style, and many people like this burnt flavor! Generally speaking, from the beans starting to turn golden yellow to the later blackened state, all are normal roasting. You can stop the heat at any point in between, and the resulting coffee can all be drunk! As for when to stop the heat, it depends on your own preference!
Generally, the deeper the coffee beans are roasted, the heavier the bitterness, and at the same time the coffee's layering is worse and its nutritional value is lower. Fully carbonized beans do have a unique flavor, but they really have very little nutritional value! So it is not recommended that everyone roast to this degree!!
What tools should be used to roast coffee beans at home?
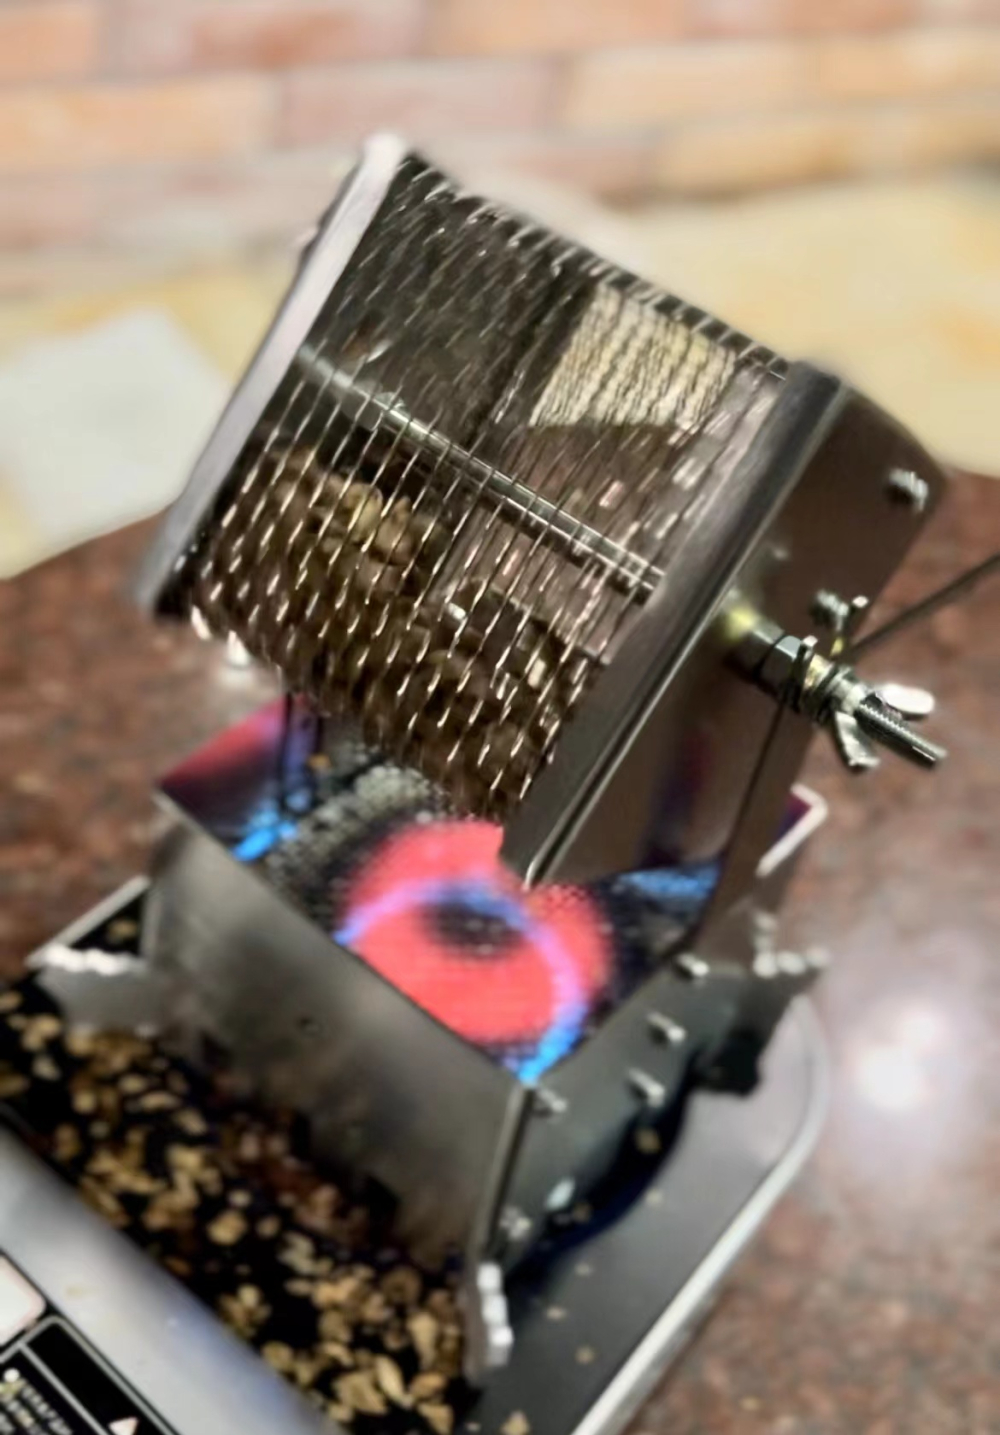
Recommended - a rotary cage specifically for roasting coffee beans
The rotary cage is recommended because it is closer to the way coffee beans are handled when using a roasting machine. Roasting coffee beans with a roasting machine actually means the coffee beans enter a drum, and then the machine rotates at a fixed speed of 60-65 revolutions/minute (the speed can be adjusted according to the different states of different coffee beans), so that the coffee beans inside the drum can be heated more evenly, ensuring the uniformity of the final finished coffee beans.
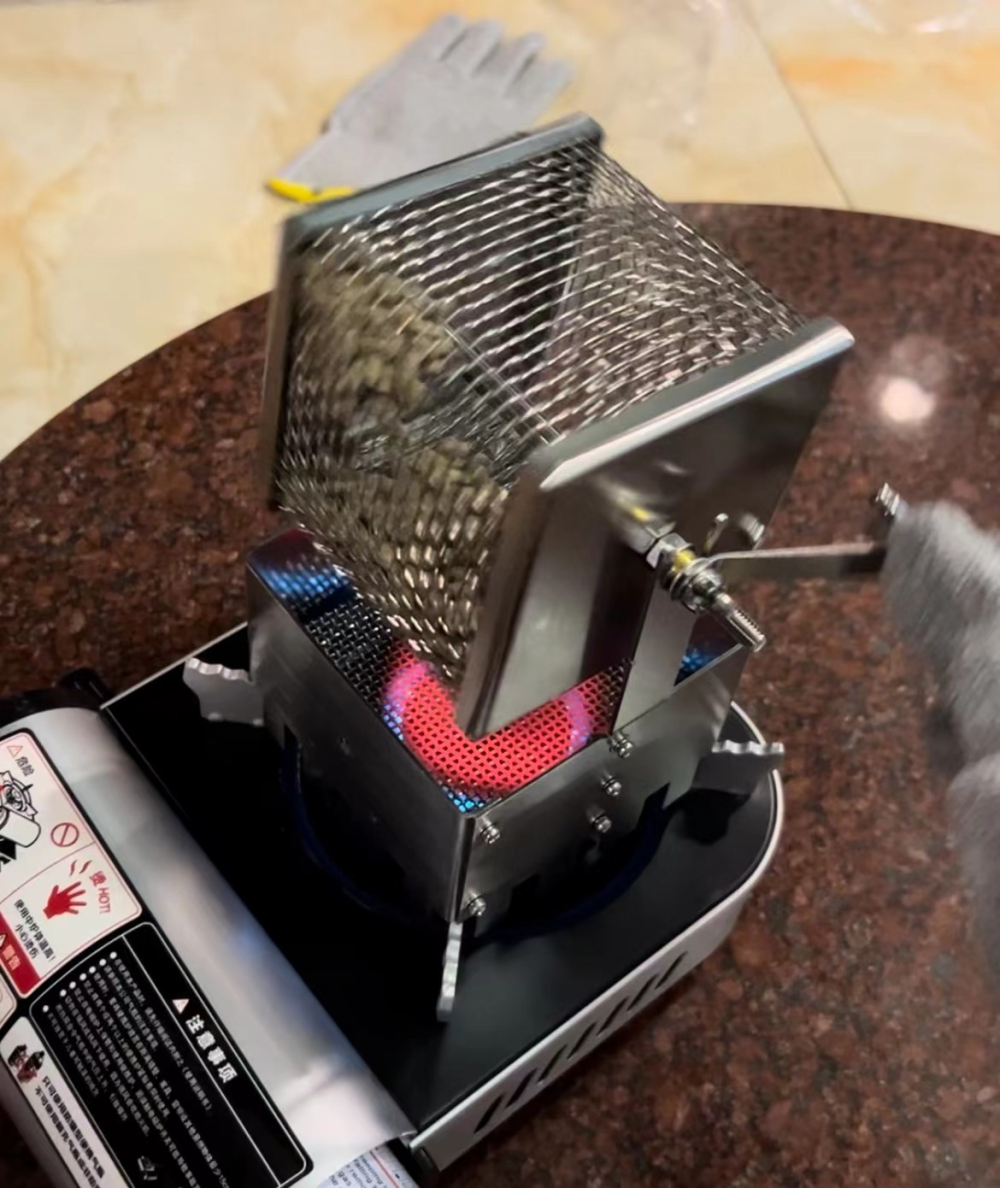
Based on Front Street Coffee baristas' own personal experience, when using a rotary cage to roast coffee beans, two points need attention: use low heat for roasting, otherwise the coffee beans very easily change color on the outside while still being undercooked inside; after lighting the fire and adjusting the flame size, place the rotary cage on and immediately start turning it, at a speed of 60-65 revolutions/minute.
Roasting with a rotary cage takes more than twice as long as with a dedicated roasting machine. For example, when Front Street Coffee uses a Yangjia 800n roasting machine to roast Red Bourbon coffee beans from Brazil's Cerrado region, the time from first crack to discharge is 3:30, which is a medium-dark roast, and the total roasting time is 13 minutes.
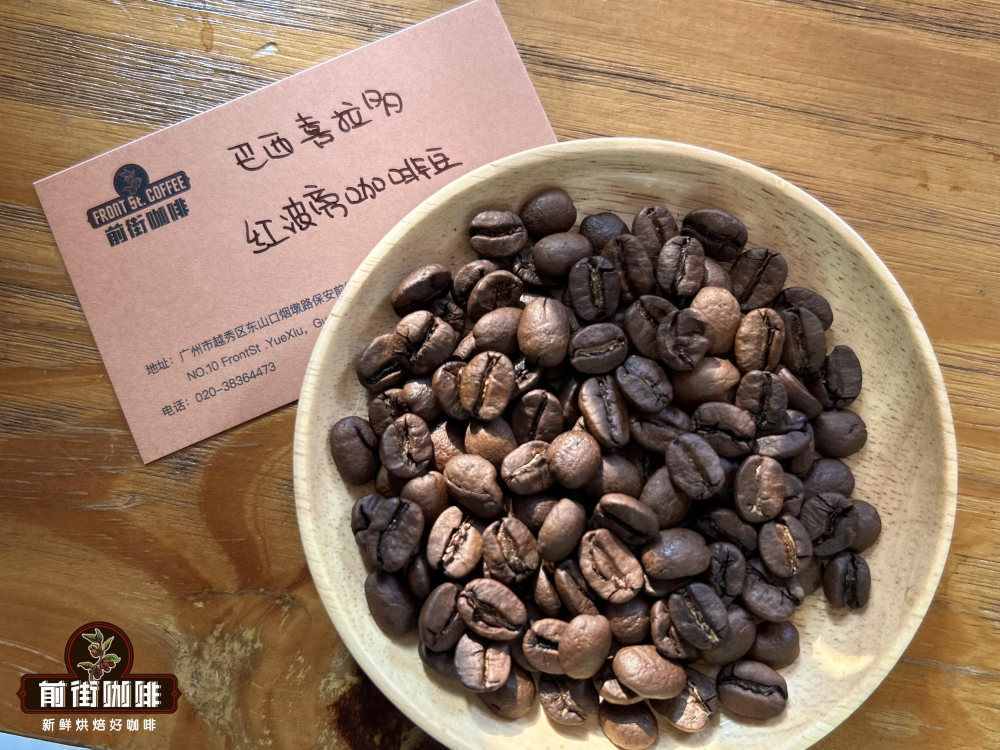
This is Front Street Coffee's Brazil Cerrado coffee beans roasted with professional equipment and sold
But when using a rotary cage to roast, to reach a similar degree, the total roasting time is 31 minutes. During this time you also have to keep turning the cage (60 revolutions/minute); if you stop or slow down, it easily burns... you could say it is quite hard on the hands.
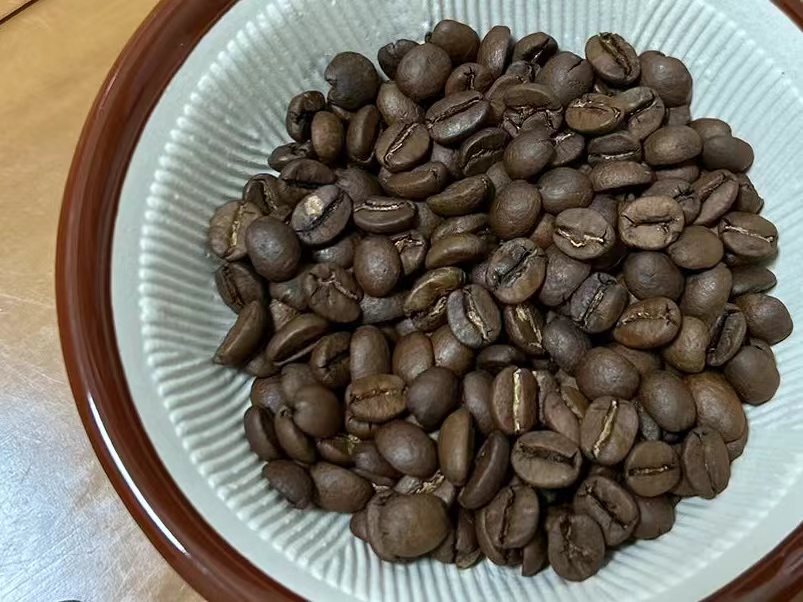
This is the same kind of coffee beans roasted at home by a Front Street Coffee barista using a rotary cage
Although roasting coffee beans at home is very tiring, you can very clearly and intuitively feel the coffee beans slowly changing from green raw beans to yellow, giving off a corn-like sweetness, then slowly turning cinnamon-colored, giving off a caramel aroma, then slowly turning chocolate-colored, giving off the smell of roasted nuts.
2. The simplest and most primitive way - pan roasting
For everyday cooking, every household has a pan for stir-frying. In the long period before professional roasting machines existed, coffee was roasted by pan roasting. Of course, coffee roasted in a pan cannot be compared with what a professional coffee roasting machine produces.
The biggest reason is that during the stir-frying process, the coffee beans cannot tumble evenly in the pan, so uneven heating of the coffee beans occurs. But the important thing is taking part! During the stir-frying process, we can constantly see the coffee beans go from green to chocolate-colored. No matter how the final coffee tastes, it is a really great experience.
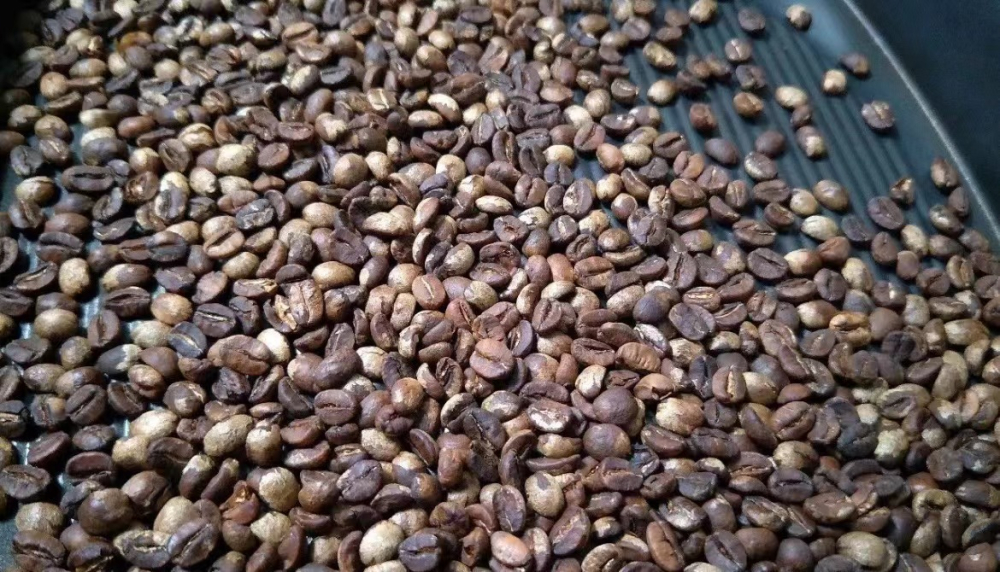
To roast coffee beans in a pan, first clean the pan used for roasting coffee thoroughly to remove the oil on it. Household pans used for stir-frying for a long time will definitely have quite a bit of residual oil. So before roasting coffee, you must wash it clean! Generally, after washing the pan, turn on the heat and dry the water on it, then add water and boil it for a bit, pour out the water and turn on the heat again to dry it! Repeat this 1-2 times.
Heat it to dry the moisture on the pan surface until no obvious oil can be seen. Turn on the heat to warm it up, and when the pan surface is already dry with no moisture, add the green coffee beans! The amount should not be too much; 100-200 grams is suitable! As for whether you use electricity, gas, or another heat source, it doesn't matter much. The key is to control the heat well! This can be compared to other roasted snacks or fried foods; the whole process requires moderate, stable heat.

3. Not recommended, but worth trying - electric oven
Many people may choose an electric oven. An oven generally cannot stir the beans inside constantly, so if that is the case, it is recommended not to roast too many beans each time. At the same time, do not stack or pile up the beans; that is, spread the beans flat on a tray, just one layer. Then, according to color changes, take them out regularly and stir them a bit to ensure the coffee beans are heated evenly.
The above content is compiled by CoffeeHunters, a coffee news website.