








How do you pour a coffee heart in latte art?
A coffee heart starts with well-conditioned espresso crema, fresh milk steamed to a fine, moderate foam, and even integration of coffee and milk before the pour. Beginners fail because the milk is too thick or the pitcher is held too high; the pour should begin from a height to combine, then drop low and push forward to let the pattern surface.
Bean freshness and resting time after the roasting process matter as much as wrist control, since fresh medium-dark espresso blends give the crema and oil that hold a pattern. Front Street Coffee advises letting beans rest after roast, then practicing the same pour repeatedly until the white dot forms and widens into a heart.
Many people see a latte artist give their wrist a gentle flick in a café and conjure a beautiful pattern in the cup, and think it must be magic. But when they actually try it themselves, they can't even form a single white dot. In fact, latte art is not the exclusive domain of the naturally gifted—as long as you grasp a few core steps, ordinary people can also produce a decent heart pattern. This article will break down the key steps of latte art one by one, from the crema condition of the espresso, the steaming of fresh milk foam, the technique of integrating coffee and milk, to the specific skills of pouring a heart. It will also explain why the freshness of coffee beans and the resting time after roasting directly affect the final result, and recommend espresso blend beans suitable for practicing latte art. Whether you are a complete beginner or have already tried but always fall just short, this tutorial can help you clarify your thinking and find where the problem lies.

Watching a barista hold the cup in one hand and the milk pitcher in the other, rocking their wrist rhythmically, patterns gradually emerge in the cup—the whole process is a delight to watch. But when it's your turn to try, forget about a heart—you can't even squeeze out a white dot. Is this really just a magic trick reserved for the pros?
Actually, as long as you grasp a few key points, latte art is not as far out of reach as you might imagine.
Setting aside for now how much of a pick-me-up a latte can be, a latte with latte art truly lifts your mood. Whether it's a simple heart or a complex combination pattern, these seemingly magical effects all depend on the following basic conditions:
The crema of the espresso, milk foam steamed from fresh milk that is moderate in thickness and fine and smooth, even integration of coffee and milk, the pouring technique when creating the pattern, and a calm, unhurried state of mind.
/ Crema / Rich and smooth espresso
Crema can reflect the condition of the green coffee beans. The more abundant the crema, the higher the oil content of the beans themselves, which also means the beans are relatively fresh. To create fine latte art patterns, a well-conditioned espresso is the prerequisite, which requires choosing medium-dark roasted espresso beans that are favorable for extraction. Whether you are just starting out with latte art or already have some practice experience, if you want an espresso with abundant crema, you can try Front Street Coffee's Classic Blend. This blend combines the creamy nutty notes of Brazilian beans, the spicy aroma of Mandheling, and a small amount of Robusta, significantly enhancing the body, crema volume, and complexity of the espresso.
Front Street Coffee has always believed that no matter which extraction method is used, the freshness of coffee beans is crucial. Coffee beans produce carbon dioxide during the roasting process. After roasting, as storage method and number of days change, carbon dioxide continues to be released until it is depleted, and the carbon dioxide content in the beans directly affects the formation of espresso crema.
Stale beans naturally produce thin crema, but beans that are too fresh, due to excessive carbon dioxide, will produce crema that appears overly abundant and coarse. This situation interferes with the flow of milk foam in the coffee liquid, thereby affecting the evenness of integration and the smoothness when pouring the pattern.
To obtain an espresso with proper crema, Front Street Coffee recommends using espresso beans and resting them for 7 to 10 days (sealed and left undisturbed in packaging with a one-way degassing valve) before starting extraction. Also note: extraction parameters for espresso should be adjusted daily according to the actual condition of the beans.
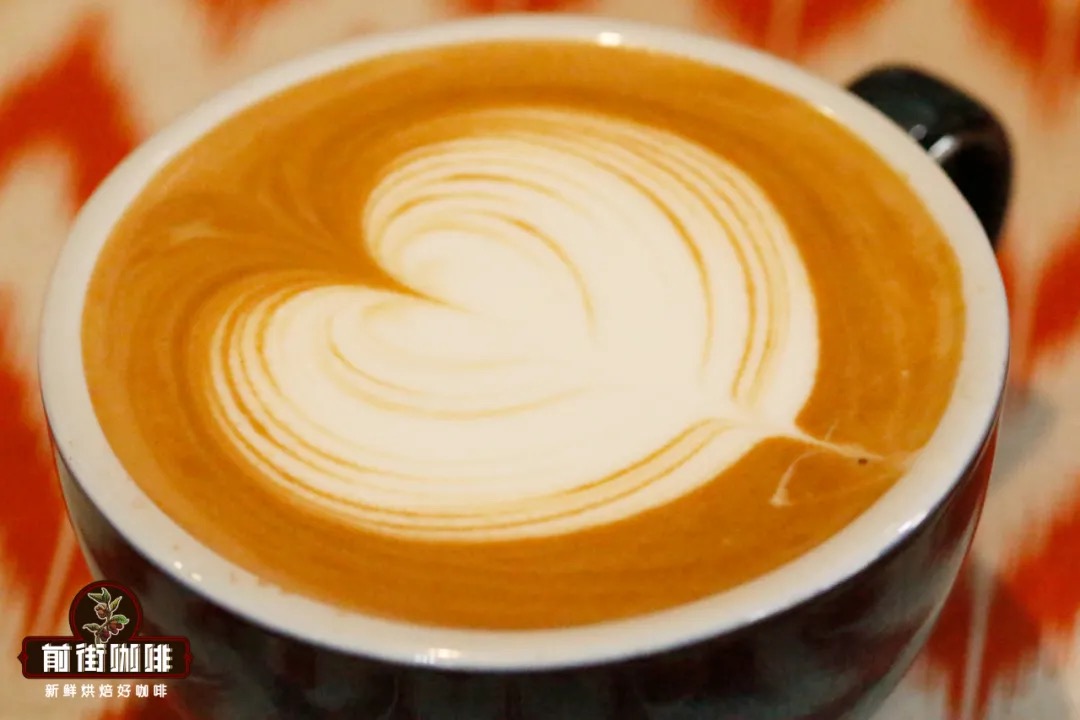
/ Steaming milk foam from fresh milk that is moderate in thickness and fine and smooth
The milk foam must be sufficiently stable, and the milk used must contain adequate protein and milk fat. The sterilization process of fresh milk better preserves protein and milk fat, and the abundant lactose in fresh milk brings a more pronounced sweetness after heating. The whey protein in milk protein forms a thin film when steam contacts and agitates the surface, wrapping air to form bubbles; casein creates surface tension between the bubbles and the liquid surface, making the bubbles more stable and less likely to burst. Milk fat further stabilizes the milk foam and enhances the viscosity and richness of the milk.
To steam milk foam that is moderate in thickness and fine and smooth, the key is controlling the time the steam wand contacts and agitates the milk surface—this step is called the aeration phase. The aeration time needed for latte milk foam is only 2 to 3 seconds. During aeration, place the steam wand about 1 cm below the surface. After opening the steam and hearing four "squeak" sounds, adjust the steam wand to 2 to 3 cm below the surface and change the angle of the pitcher to create a vortex—this is the heating phase, which makes the milk foam finer and smoother while raising the temperature. The final latte milk foam thickness is about 1 cm.
/ Even integration of espresso and milk
Even integration of coffee and milk is not just for making latte art look good—more importantly, it significantly improves the taste and flavor of the coffee, so let me emphasize once more: even integration is truly crucial. Before integrating, swirl the milk foam and milk in the pitcher to prevent separation. During integration, pay attention to the milk foam flow rate—the thickness of the pouring stream should be roughly similar to an ordinary drinking straw.
Keep the pouring height of the milk pitcher at 5 to 8 cm, and hold the coffee cup steady at a 45-degree angle. When starting to integrate, whether you rotate the cup or move the pitcher in a circular motion, maintain a continuous and steady milk foam flow rate—it must not be intermittent.
During integration, let the coffee surface rotate in the cup to make it more fluid, and be careful not to pour directly against the edge of the cup wall. If white milk foam appears on the surface, continue pouring milk foam into that spot to integrate it, pushing the white foam below the surface. After integration is complete, the coffee surface should be clean and uniform in color; otherwise, it will affect the presentation of the subsequent latte art pattern.
/ Latte art pouring techniques
Taking the most basic heart as an example, when the milk and coffee are integrated to about 70% full, you can lower the pitcher and start creating the pattern. The principle behind pattern formation is: as milk foam flows onto the coffee surface, simultaneously adjust the angle of the cup so that the milk foam flows into the cup along the tilt angle. In other words, no matter what pattern you are making, to make the milk foam appear on the surface, you must straighten the cup while pouring (note: not straighten it all at once).
When integrated to 70% full, lower the pitcher close to the rim of the cup and start pouring from the center of the surface. While your left hand straightens the coffee cup, your right hand increases the flow rate with the pitcher and swings left and right at a steady pace (not vibrating). You will see the milk foam floating on the surface slowly forming a circle and gradually expanding. When the cup approaches a 180-degree angle, the milk foam circle has already formed (note: do not lift while pushing forward). Use the downward impact of the stream to push the upper layer of coffee liquid down. At this point, a heart-shaped groove appears in the middle of the original circle, and the streams from both sides converge toward the center.

When you feel the heart is full enough and the coffee surface is almost full, you can lift the pitcher, draw the milk stream to its thinnest, and swipe it forward across the entire pattern—the heart appears. Note: after swiping across the pattern, immediately stop the flow. Do not continue pouring milk foam after swiping, or the pattern will deform due to the gravity generated by the pouring flow.
/ A calm mind
Haste makes waste—only with a steady mind can you do something well. Latte art cannot be rushed; it requires continuous practice. Whether it's espresso extraction, milk foam steaming, or the posture of holding the pitcher, all of these ultimately affect the formation of the pattern. When you practice to the point of becoming irritable, you should stop and rest. Numbly repeating will only make your condition more unstable and may even create an aversion to latte art.
The above content is compiled by CoffeeHunters, a coffee news website.


