








How Do You Froth Milk for a Latte With Thin Foam?
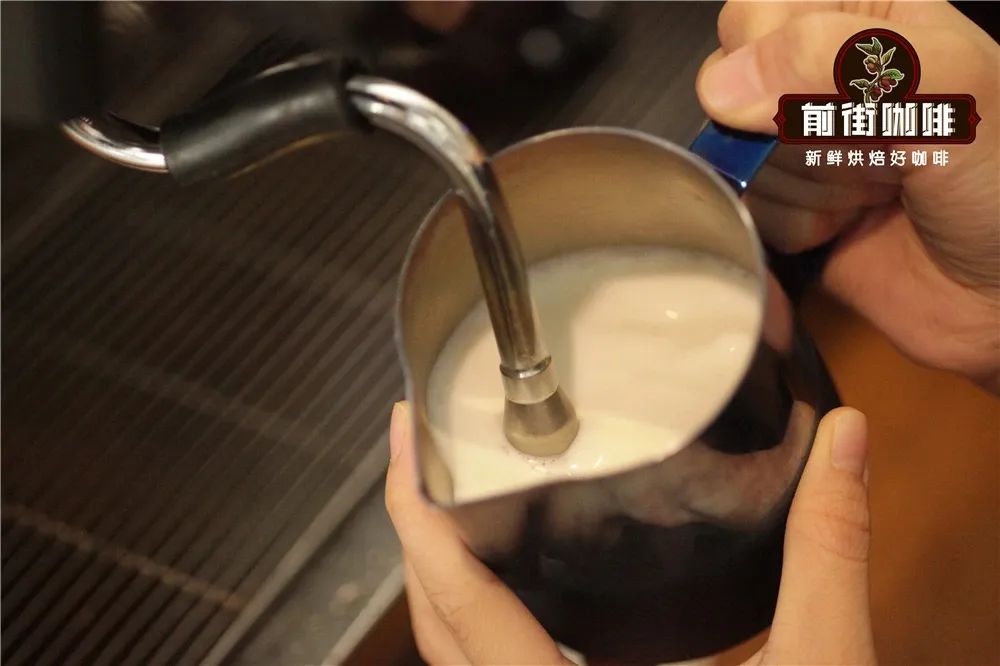
Making a multi-layered heart starts with the milk: froth it to about 60% fullness, keeping the foam thin, fine and fluid, because thick foam will not spread into clean stripes when poured. The pouring sequence mirrors a solid white heart, with one extra pitcher swing at the finish to separate the layers.
Use less milk for incorporation and watch the pitcher spout start position and flow rate; holding the pitcher with a steady grip and returning the cup at an even rhythm keeps the stripes sharp. Because the milk ratio and foam texture decide the outcome, the same technique carries over to wheat ear and swan patterns.
The multi-layered heart may look complex, but it is actually an advanced variation built on the solid white heart—just add one more pitcher-swinging motion, and you can produce clearly defined layers. However, it places higher demands on milk foam thickness, the amount of milk used for incorporation, and manual dexterity. This article by Front Street Coffee breaks down the full process of making a multi-layered heart in detail: from precisely controlling the milk froth to 60% fullness, to comparing and recommending two pitcher-holding postures, and then to the flow rate and cup-return rhythm during the actual pouring, helping you transition smoothly from the solid white heart to the multi-layered heart and laying a solid foundation for subsequent complex patterns such as the wheat ear and swan.

The multi-layered heart sounds quite difficult, but in fact its operating logic is not complicated—it is simply the solid white heart with one small extra step added. From the amount of milk injected during incorporation, the starting position where the pitcher spout touches the liquid surface, all the way to the finishing gesture at the end, it is basically identical to the solid white heart. Because of this, many beginners practicing the solid white heart repeatedly may even unintentionally produce a prototype of the multi-layered heart. Below, Front Street will talk with you about several key steps in making the multi-layered heart. If you are not yet very familiar with how to make the solid white heart, you can first read the previous article → "Solid White Heart Latte Art Tutorial."
Milk Foam Thickness
Compared with the solid white heart, the multi-layered heart has noticeably stricter requirements for milk foam quality. The reason is that once the milk foam is whipped too thick, its fluidity during pouring is greatly reduced, and the patterns become difficult to spread smoothly. Therefore, making a multi-layered heart requires thin milk foam that is fine in texture and smooth on the palate. If the milk foam used for the solid white heart is whipped from 50% full to 60%–80% full, then the milk foam for the multi-layered heart only needs to be whipped to 60% full; the more it exceeds that, the harder it becomes to pour clear stripes.
However, you should not go to the extreme and whip it too thin either. When the milk foam is too thin, the surface of the pattern tends to develop rough, jagged textures. This style is more suitable for experienced advanced players; beginners often find it difficult to handle.
Amount of Milk for Incorporation
Front Street mentioned in a previous article that the more milk injected during the incorporation stage, the higher the liquid surface in the cup, and the weaker the convection effect; conversely, the less incorporation, the lower the liquid surface, and the stronger the convection produced during latte art. Like the solid white heart, the multi-layered heart needs sufficient convection intensity to support a full pattern structure, so we should control the amount of milk used for incorporation to be somewhat less, leaving more ample space for the pattern to unfold.
Pitcher-Swinging Motion
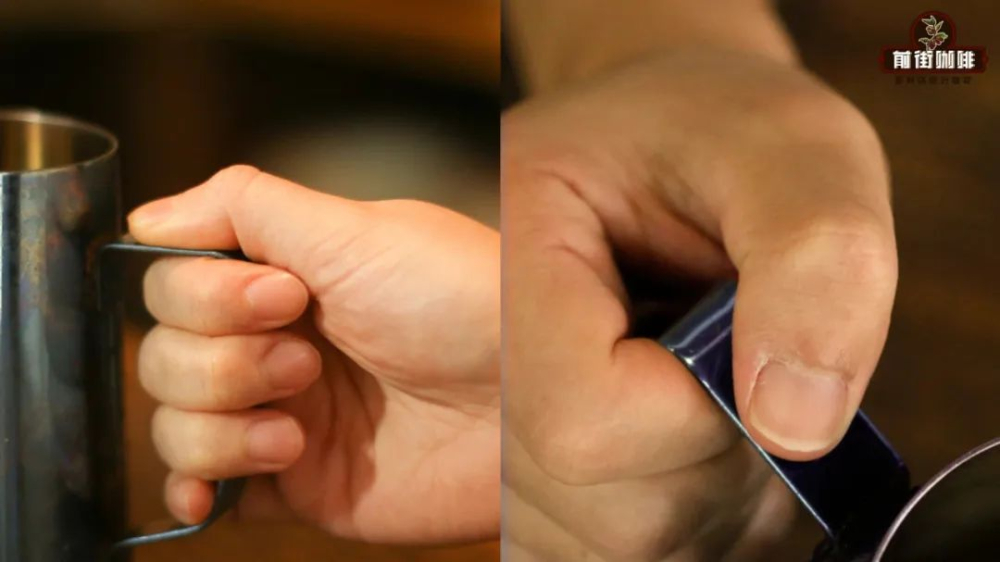
The most core difference that sets the multi-layered heart apart from the solid white heart is the addition of the pitcher-swinging motion. While pouring the pattern, you coordinate with a back-and-forth wrist swing to form beautiful multi-layered patterns. Because pitcher swinging itself requires a certain accumulation of skill, Front Street suggests first deciding on your pitcher-holding posture, and then focusing on practicing the swing. This is because once you have become proficient at swinging with one grip, if you switch to another posture, you will have to spend time adapting again.
Posture ①: Use the handle of the milk pitcher as the pivot, secure the position by gripping it with your thumb and index finger, and use the remaining three fingers to generate force, driving the pitcher to swing back and forth left and right.
Posture ②: Also use the top of the handle as the pivot, pinch it from both sides with your thumb and index finger and apply force to swing the pitcher, while the remaining three fingers are responsible for stability.

No matter which method you choose, repeated practice is indispensable to achieve ease and proficiency. Front Street personally prefers to recommend Posture ②, because when later transitioning to patterns such as the wheat ear and swan, this way is more convenient.
Actual Pouring Practice
Finally, we have arrived at the practical operation section. The incorporation steps for the multi-layered heart are consistent with what was said earlier and are not very different from the solid white heart; incorporate to 60% full and that is enough. The injection point is
As the right hand swings rhythmically back and forth, the left hand must slowly straighten the cup in sync. When the amount in the cup reaches 9 parts full, you need to raise the pitcher spout to complete the finishing action.
Isn't it pretty simple? Did you learn it?
Front Street Coffee
No. 10, Bao'an Front Street, Yandun Road, Dongshankou, Yuexiu District, Guangzhou City, Guangdong Province
The above content is compiled by CoffeeHunters, a coffee news website.


