








How Do Coffee Particles and the Coffee Bed Guide Pour-Over Brewing?
Pour-over coffee starts with four parameters: grind size, water temperature, coffee-to-water ratio, and brewing time. Wet the paper filter first to remove its papery taste and seat it in the dripper. Bloom the grounds with roughly 30 ml of water, about twice the coffee weight, and let it rest 20 to 30 seconds before pouring in stages.
Reading the coffee bed helps judge whether extraction is even. Watching how coffee particles settle and how the bed drains points to problems such as a failed bloom, bitterness, or thin flavor. A conical dripper is the usual starting setup, and unbleached filters are common because their own odor rinses away with hot water.
Many coffee enthusiasts who have purchased coffee beans from Front Street often ask us through the backend about the specific methods for pour-over coffee. This article will systematically organize the introductory knowledge of pour-over coffee for beginners, starting with a detailed interpretation of two professional videos, covering key steps such as wetting the filter paper, controlling the blooming time, and segmented pouring techniques, and explaining in detail the setting principles of the four core parameters: grind size, water temperature, coffee-to-water ratio, and brewing time. In addition, the article uses various coffee bed state illustrations to help readers determine whether the extraction is even, and provides troubleshooting ideas for common problems such as failure to bloom, bitter coffee, and insufficient flavor.

Many friends, after getting Front Street's coffee beans, choose to brew at home, and also leave messages in the backend asking Front Street for advice on pour-over brewing methods. So, Front Street here briefly chats with beginner friends about what aspects to start with when first getting into pour-over coffee.
First, watch a video
The first video comes from "The Top Barista's Introductory Reader for Beginners" and shows a segment of the brewing process using a conical dripper.
Link: https://www.bilibili.com/video/BV1fs411V76s/?spm_id_from=333.337.search-card.all.click
In this video, a Japanese barista fully demonstrates the standard operation process for pour-over coffee with a conical dripper, and there are several details especially worth noting.
1. The first step is to wet the coffee filter paper with water. From the video, it can be seen that the filter paper used is unbleached. Wetting the filter paper serves two purposes: first, to remove the woody smell carried by the filter paper itself; second, to make the filter paper adhere more snugly to the dripper. If hot water is used to wet it, it can also warm the cup at the same time, preheating the dripper and the server, but don't forget to pour out the hot water in the lower server!
2. In the blooming stage, the explanation in the video is to fully wet all the coffee grounds, with about 30 ml of water for blooming (about twice the amount of coffee grounds), and the blooming time controlled at 20 to 30 seconds. So in actual brewing, should it be 20 seconds or 30 seconds? This depends on the roast date of the coffee beans. The essence of blooming is the process of coffee grounds releasing gas. When degassing is complete and the aroma begins to be released, that moment can be regarded as the end of blooming. If it is difficult to grasp this point, then use the cessation of bubbles as the criterion, and keep the blooming time within the range of 20 to 30 seconds;
3. During brewing, a segmented pouring method was used, and each pour did not wait until the coffee bed was completely dry before continuing the next pour. After brewing is finished, it can be seen that what forms in the dripper is a coffee bowl rather than a flat coffee bed, which indicates that the water volume was properly controlled throughout the pouring process, and there was no situation where water flowed directly into the lower server without passing through the coffee grounds. This problem is especially likely to occur with the V60 dripper, because the V60 has a spiral rib design and its flow rate is inherently relatively fast. If the water level is too high during pouring, it is easy for some coffee liquid to flow away without sufficient extraction.
4. During pouring, it can be observed that the water stream always falls vertically and moves along a small circular path. This is determined by the characteristic of the conical dripper: the coffee bed is thicker in the center and thinner around the edges. Doing this is also to prevent water from bypassing the coffee grounds and flowing directly into the lower server, causing insufficient flavor. In addition, note that after brewing ends there is a action of shaking the lower server, the purpose of which is to mix the liquid in the server evenly and avoid one sip being weak and another strong.
Next, look at another video, which is the competition record of Wang Ce, the 2017 World Brewers Cup champion. The following is an edited segment of the brewing process at that time.
Link: https://www.bilibili.com/video/BV1AW41137Je/?spm_id_from=333.337.search-card.all.click
In the competition, he served three cups of coffee at the same time. Please focus on the blooming stage of the first cup: the total brewing time for this cup was 2 minutes, and the blooming lasted 28.86 seconds (timed from the first pour), after which he poured again. After he poured all 250 ml of water, he did not rush to remove the V60 dripper, but waited for all the extracted coffee liquid to flow completely into the lower server.
In daily observation, we find that some baristas, after reaching the predetermined extraction time, directly remove the dripper even if there is still residual water in it. This detail will cause a deviation in the coffee liquid's coffee-to-water ratio, which is to say that during brewing, an appropriate flow rate was not used, and the extraction time and coffee-to-water ratio did not match.
Overall, there is no single standard answer for pour-over coffee. The key is to obtain a just-right cup of coffee under the three conditions of suitable grind size, suitable water temperature, and suitable brewing time—neither under-extracted nor over-extracted. Around this principle, you can adjust the technique and various parameters according to your own actual situation and the specific characteristics of the coffee beans.
For beginners, as long as you master the key elements of pour-over coffee—grind size, water temperature, coffee-to-water ratio, brewing time, and brewing technique—brewing a good cup of coffee is basically not difficult.
Coffee grind size: No matter which coffee brewing method is used, grind size is the most core variable. Pour-over coffee grind size has two measurement indicators: one is uniformity, and the other is coarseness. Uniformity is very important and mainly depends on the grinding quality of the grinder. If there are too many fines, then the only solution is to upgrade the equipment. Coarseness has a reasonable range. Grinding too fine easily makes it bitter and astringent, while grinding too coarse makes the taste weak.
Front Street's recommended standard for pour-over grind size is: using a No. 20 standard sieve, with a passing rate between 70% and 80% (if you don't have a sieve, it is recommended to get one; they are not expensive, within 50 yuan). Light-to-medium roasted beans are suitable for the 75% to 80% range, and medium-to-dark roasted beans are suitable for the 70% to 75% range.
[Beginner tip for judging roast level: look at the flavor description on the packaging. If the description includes citrus, lemon, berries, and other fruity notes as well as floral acidity, it is light roast; if the description is mainly sugar, nuts, and chocolate, with slight fruit acidity, it is medium roast; if the description is nuts, chocolate, cream, and a full-bodied mouthfeel, then it is dark roast! Note: not absolutely accurate, but applicable in most cases]
Brewing water temperature: In the pour-over brewing process, the higher the water temperature, the stronger the coffee taste; conversely, the lower the water temperature, the harder it is for the coffee flavor to be released. Front Street Coffee recommends a brewing water temperature of 86°C to 93°C. Front Street Coffee stores choose different water temperatures according to the roast level of the beans when serving: light-to-medium roast uses 90°C to 93°C, and medium-to-dark roast uses 86°C to 89°C.
Coffee-to-water ratio: Front Street Coffee stores use 15 grams of coffee grounds when serving and pour 225 grams of water during brewing, that is, a coffee-to-water ratio of 1:15. The reason Front Street Coffee chose 1:15 is that at this ratio the coffee has better balance and a more even flavor distribution.
The coffee-to-water ratio is not limited to 1:15. The recommended coffee-to-water ratio range for pour-over coffee can be from 1:14 to 1:18. The smaller the coffee-to-water ratio, the stronger the coffee; the larger the coffee-to-water ratio, the lighter the coffee. You can adjust flexibly according to your preferred taste.
Brewing time: If the above parameters from Front Street are used, the brewing time for a pot of pour-over coffee is about 2 minutes, with an error controlled within 10 seconds. Brewing time is more like a verification parameter—if all your previous parameters were set reasonably, but the brewing time deviates, then the problem is most likely in the pouring stage. If you think there is no problem with your pouring technique, then you need to check whether the grind size is appropriate.
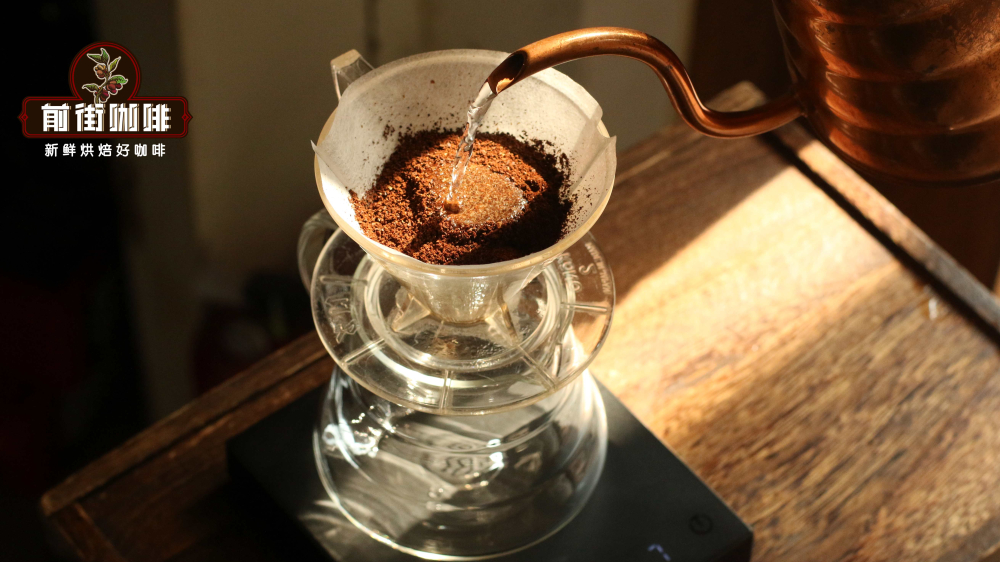
Finally, we arrive at the pour-over technique section that everyone cares about most, that is, how to control hand movements in actual operation to brew coffee. As shown in the first video, a delicious cup of pour-over coffee does not require particularly advanced skill. It is enough to keep the water flow stable, the stream vertical, and pour in circles at a steady speed. The purpose of pouring in circles is to prevent the water from wandering everywhere, to plan a path for the water flow, and thereby achieve even extraction. In addition, the video especially emphasizes not to pour onto the boundary between the dripper and the coffee grounds, also to avoid breaking through the coffee wall, causing subsequent water to flow directly down without passing through the coffee grounds.
Of course, the state of the coffee bed after brewing can also provide you with a lot of information, such as:
After normal brewing is completed, the coffee bed appears bowl-shaped, with the coffee wall around it of consistent thickness and the bottom pit surface flat. This is the most ideal coffee bed state after even extraction.
From this coffee pit, the problem of uneven pouring can be seen: the left side of the coffee bed is low and the right side is high, the coffee wall is thin on the left and thick on the right, and the left coffee wall shows signs of being broken through. The reason may be that the water flow is not stable enough—when going around the outer circle, the direction away from the pouring kettle has a larger flow and stronger impact, while the direction closer to the pouring kettle has a smaller flow. After the coffee wall is broken through, a "channeling effect" occurs, and water flows away along the dripper's ribs, resulting in uneven extraction.
On the uppermost coffee wall of this coffee pit, scattered coffee particles and oil foam are distributed. This may be because during multiple pours, the later pour overflowed the previously formed coffee wall, and water that overflowed the coffee wall flowed away from the edge of the ribs, causing under-extraction or low concentration.
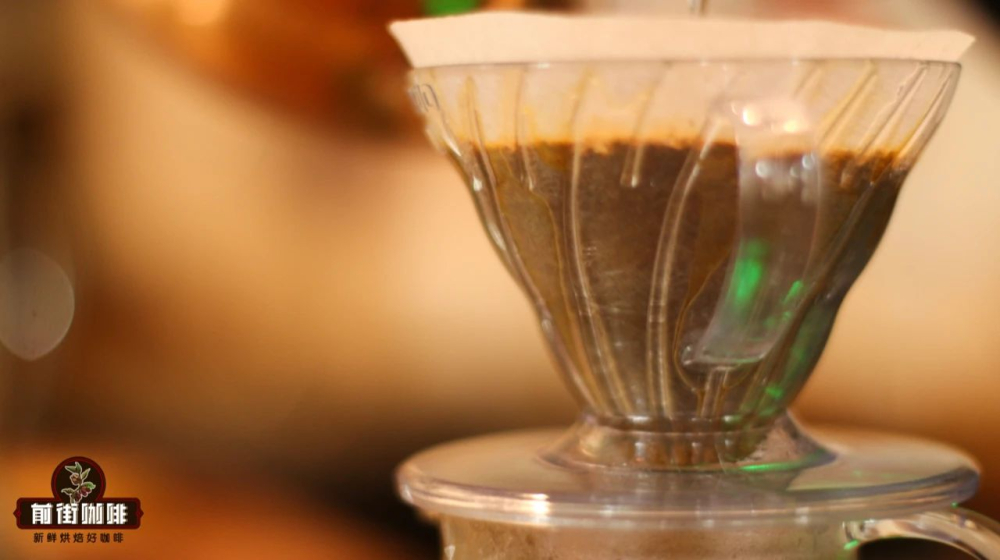
The fines in this coffee bed appear muddy at the bottom. The reason is that there are too many fines, which will result in the coffee becoming bitter. Moreover, the coffee grounds attached to the dripper wall were all washed down, leaving only coffee oils at the edges. This is clearly because when pouring in circles, the circle was too large and hit the filter paper.
This coffee bed shows an obvious fault line, and the coffee wall is relatively thick. The reason is that the coffee bed height is relatively low, possibly caused by pouring in a small circle in the center with a small water stream—the impact in the center was too strong, while the water permeated slowly through the coffee bed at the edges, resulting in uneven extraction of the coffee bed.
This coffee bed clearly shows that the coffee particles are relatively large, a problem caused by improperly set grind size.
Are there any other questions that are asked more often?
Q: Why does the coffee not expand during blooming?
A: There are three reasons: first, the beans are not fresh enough; second, the grind size is inappropriate; third, light-roasted beans themselves do not expand obviously.
Q: What causes bitterness and astringency in coffee?
A: First check whether there are problems with water temperature and grinding. When there is no problem with bean quality, it is usually caused by grinding too fine or too many fines. Of course, excessively high water temperature can also easily bring bitterness and off-flavors.
Q: What is going on when the coffee has no flavor?
A: First check whether the water temperature, grind size, and coffee-to-water ratio are reasonable. Water temperature (86-93°C) and coffee-to-water ratio (1:15) are relatively easy to verify. For grind size, you can observe the flow rate during brewing. If extraction is completed earlier than 1 minute 30 seconds, it indicates the grind is too coarse. Also confirm whether the coffee bed was broken through.
You see, the problems that appear when brewing coffee basically all come back to grind size. Conversely, as long as grind size is well controlled, a large number of problems can be avoided.
For professional coffee knowledge exchange and more coffee bean information, please follow Coffee Workshop (WeChat public account: cafe_style) For more specialty coffee beans, please add the private WeChat of Front Street Coffee: qjcoffeex
The above content is compiled by CoffeeHunters, a coffee news website.


