








How to make froth in coffee for latte art patterns
Latte art comes down to a few controllable elements: rich, smooth espresso crema, fresh milk frothed into foam that is neither too thick nor too thin, an evenly integrated coffee surface, small pouring techniques, and a calm hand. Common pattern types vary in difficulty, but beginners can start with a simple heart before moving to combined designs.
Crema formation depends on bean freshness. Beans release carbon dioxide after roasting, and how they are stored and how many days pass determine how much gas remains; that carbon dioxide directly affects espresso crema. For the milk side, frothing to a smooth, fine texture is what lets the foam sit on the surface and hold a pattern instead of sinking or spreading.
Coffee latte art has always been one of the most interesting topics for many coffee enthusiasts. Watching a barista gently sway their wrist and seeing exquisite patterns emerge in the cup is a delightful process to watch; but when it's your turn to try, you might not even be able to produce a single white dot. Is latte art really only for experienced baristas? Actually, that's not the case. This article will systematically outline the common pattern types and difficulty levels in coffee latte art, and around core points such as crema extraction, milk frothing, coffee and milk integration, pouring techniques, and mindset adjustment, explain in detail how to make latte art. At the same time, it will also recommend Front Street Classic Espresso Blend coffee suitable for practicing latte art, helping readers gradually master latte art techniques from the basics.

For more specialty coffee knowledge, please follow: Front Street Coffee (Frontsteet Coffee)
Watching a barista hold the coffee cup in one hand and the milk pitcher in the other, swaying their wrist evenly, and seeing beautiful patterns appear in the cup one after another—the process is so soothing! But! When it comes to your own hands, forget a little heart—you can't even get a white dot out... Could it be magic that only experienced baristas can perform?!
Master these key points, and coffee latte art is no dream!
I don't know how much of a pick-me-up latte coffee is for a person, but latte coffee with latte art will definitely make someone happy! Whether it's a simple little heart or a complex combined pattern, these latte art techniques that seem like magic are actually all inseparable from these: crema rich and smooth espresso, fresh milk frothed into milk foam that is neither too thick nor too thin and is smooth and fine, an evenly integrated coffee surface, small techniques for pouring patterns, and a calm heart ~
/ crema rich and smooth espresso
Front Street believes that no matter what extraction method is used, the freshness of the coffee beans is very important~ Coffee beans produce carbon dioxide during the roasting process. After roasting is completed, depending on how the coffee beans are stored and the number of storage days, the carbon dioxide will continuously be released until it is gone, and the carbon dioxide in the coffee beans directly affects the formation of espresso crema.
The crema of stale coffee beans is certainly thin, but coffee beans that are too fresh contain too much carbon dioxide, so the extracted crema will be too rich and rough. In this case, it will affect the fluidity of the milk foam in the coffee liquid, ultimately affecting the evenness of integration and the fluidity when pouring the pattern.
If you want to get a cup of espresso with just the right amount of crema, it is recommended to use Front Street Classic Espresso Blend coffee. This is a blend composed of beans from three origins: Brazil, Indonesia, and Vietnam. It uses a deep roast, which can maximize the rich aroma of the coffee and also allow everyone to easily extract rich and dense coffee crema. Whether making an Americano diluted with water or a latte paired with milk, it is very suitable. You can place an order at the Front Street Taobao store or the Front Street Tmall flagship store.
/ Use fresh milk to froth milk foam that is neither too thick nor too thin and is smooth and fine
If you want the milk foam to be stable enough, the milk used for frothing must have sufficient protein and milk fat. The sterilization process of fresh milk can better retain the protein and milk fat in milk, and the abundant lactose in fresh milk can give the milk a better sweetness after heating. When whey protein in milk protein contacts and mixes with the milk surface through steam, it forms a film that wraps around air to form bubbles, while casein creates surface tension where the bubbles contact the liquid surface, making the bubbles more stable and less likely to burst. Milk fat further stabilizes the milk foam and increases the milk's viscosity (body).
If you want to froth milk foam that is neither too thick nor too thin and is smooth and fine, you need to control the time the steam wand contacts and mixes with the milk surface. This step is called the aeration stage. For latte coffee, the aeration time for the milk foam only needs 2-3 seconds. During the aeration stage, place the steam wand 1 cm below the milk surface and turn on the steam. Once you hear "zzzz zzzz" four times, adjust the steam wand to 2-3 cm below the milk surface and adjust the angle of the milk pitcher to form a vortex. This step is called the heating stage, which can make the milk foam finer and smoother while heating the milk. The final finished latte coffee should have a milk foam thickness of about 1 cm.
/ Espresso and milk integrated evenly
Integrating coffee and milk evenly is not just for the latte art pattern; the most important thing is that it can further improve the coffee's mouthfeel and flavor, so don't think I'm being long-winded— even integration is truly, extremely important! Before integration, you need to shake the milk foam and milk in the pitcher evenly to avoid layering. During integration, pay attention to the flow rate of the milk foam. The thickness of the poured stream should be about the size of a regular drinking straw.
Keep the pouring pitcher at a height of 5-8 cm, and hold the coffee cup steadily at a 45-degree angle. When starting integration, whether you make circling motions with the coffee cup or the milk pitcher, you need to keep the milk foam flow continuous and stable, without intermittent breaks.
During integration, let the coffee surface rotate in the cup to make it more fluid, and remember to try not to pour toward the edge of the cup; if white milk foam appears on the surface, continue pouring milk foam there to integrate it, so that the white milk foam can be pushed below the coffee surface. After integration is completed, the coffee surface should be clean and uniform in color, otherwise it will affect the subsequent latte art pattern.
/ Small techniques for pouring latte art patterns
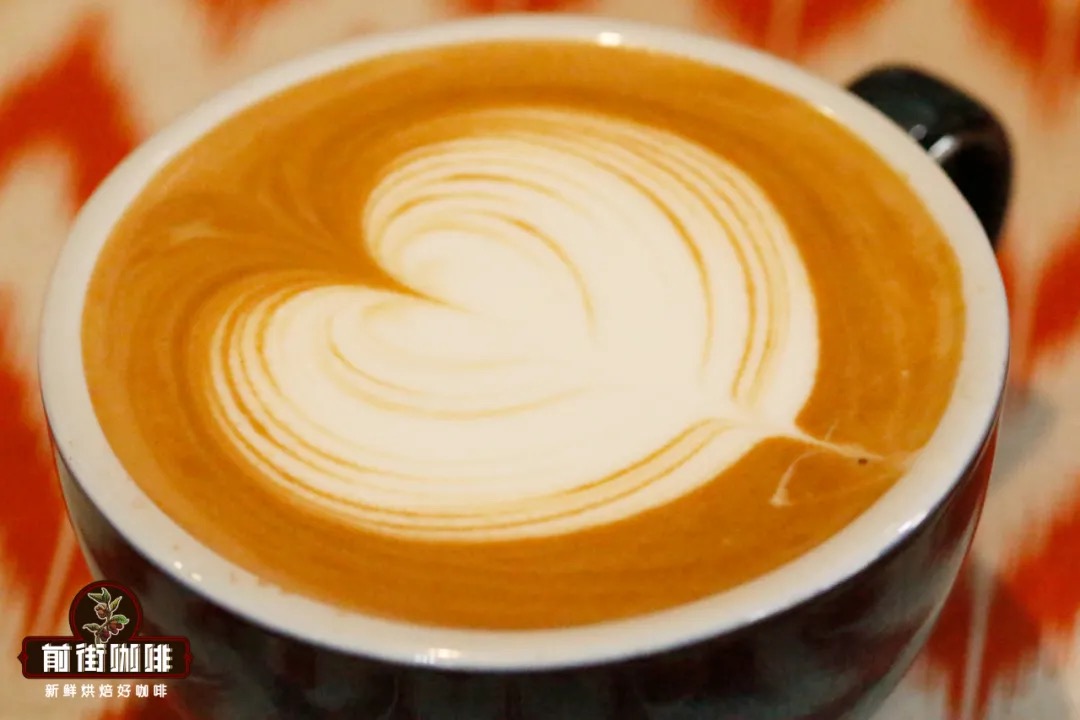
Taking the most basic heart pattern as an example, when the milk and coffee have been integrated to 70% full, you can lower the milk pitcher to create the pattern. Technique for forming the pattern: when the milk foam flows onto the coffee surface, adjust the angle of the cup at the same time so that the milk foam flows into the cup along the adjusted angle. In other words, no matter what the pattern is, if you want the milk foam to appear on the coffee surface, you must keep pouring while gradually straightening the cup (⚠️: not straightening the cup all at once).
When the integration reaches 70% full, lower the milk pitcher until it is close to the cup and begin pouring from the center of the surface. While the left hand straightens the coffee cup, the right hand's milk pitcher increases the flow rate and swings left and right evenly at a constant speed (not vibrating). At this time, you will see the milk foam float on top and slowly form a circle and gradually expand. When the cup is almost at a 180° angle, the circle of milk foam has already formed (be careful not to lift while pushing forward). Use the downward impact of the stream to push the upper layer of coffee liquid downward. At this point, you will see a heart-shaped indentation appear in the original circle, with the streams on both sides gathering toward the center.

When you feel your heart shape is full enough and the surface of the whole cup of coffee is almost full, you can raise the milk pitcher, then reduce the milk stream to the thinnest and draw it forward across the entire pattern. In this way, the heart pattern appears! (⚠️: After drawing across the pattern, immediately stop the flow. Do not continue pouring milk foam after drawing across it, otherwise the pattern will deform due to the gravity formed by the continued flow.)
/ A calm heart
Haste makes waste; only with the right mindset can you do something well. Making latte art cannot be rushed. This process requires continuous practice. Whether it is espresso extraction, milk frothing, or the posture for holding the milk pitcher (portal), all of these ultimately affect the formation of the pattern. When you practice to the point of becoming irritated, you should stop and rest. Numb practice will only make you more unstable and make you develop an aversion to coffee latte art~
The above content is compiled by CoffeeHunters, a coffee news website.


