







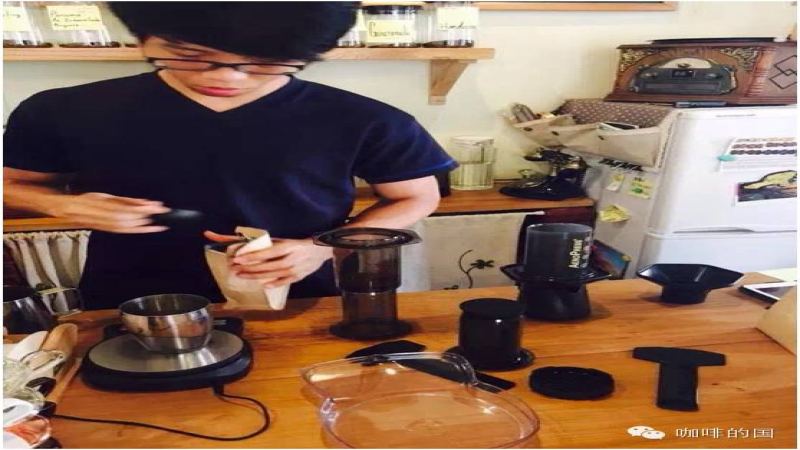
The AeroPress has become the daily go-to for many coffee lovers thanks to its simple operation, clean cup, and strong adjustability. It works by adding water to soak the coffee, then applying pressure to push the coffee liquid through a paper filter to complete extraction. The paper filter traps fine particles that don't dissolve in water, resulting in a crisp, clean mouthfeel. This article breaks down the complete process step by step—from equipment preparation, grinding, pouring, stirring, to pressing—and shares precautions and common mistakes during use. Finally, it explains how to play with different flavor directions by adjusting variables such as the water-to-coffee ratio, grind size, number of filters, pressing time, and steeping duration. The article includes recommendations and product information related to Front Street Coffee for readers' reference.
The appeal of the AeroPress lies in its low barrier to entry, clean cup, and flexibility to adjust according to personal preference. It works by first adding water to let the coffee steep, then using pressure to push the coffee-infused water through the filter to complete extraction. The paper filter itself has a certain density, so particles that cannot dissolve in water are blocked, leaving you with a cup of coffee that has a crisp, clean mouthfeel. At the end of the article, we'll teach you how to adjust several AeroPress variables to achieve different taste experiences!
AeroPress steps and process:
1. Prepare equipment: AeroPress, grinder, coffee cup, coffee server.
2. Grind the coffee. The key is to grind the coffee beans to a medium particle size. After grinding, the coffee can achieve a richer, more refined extraction.
3. Assemble the AeroPress. Insert the plunger into the brewing chamber with the black rubber part touching the 4th circle. When doing this, the numbers should face the opposite direction.
4. Rinse and preheat the filter. Run hot water through the paper filter inside the AeroPress filter cap to rinse away any residual paper taste.
5. Add freshly ground coffee. The recommended amount is 17 grams, or one level scoop of the AeroPress-specific coffee scoop of freshly ground coffee.
6. First pour. Wait 45 seconds for blooming, with water temperature at about 83°C. Start a timer set to one minute and pour in 50 ml or 1/4 cup of water.
7. Stir evenly three times to make sure there are no dry clumps.
8. After stirring, do the second pour so the total water level is slightly above the 2-circle mark. This brings the total water to about 100 ml or 1/2 cup, meaning you add another 50 ml or 1/4 cup.
9. Install and tighten the rinsed filter.
10. When the timer signals 60 seconds, gently swirl at a 45-degree angle for about 10 seconds and gently stir the coffee.
11. Using steady, gentle pressure, complete the press in 15 to 25 seconds, avoiding air leaks.
12. Dilute and enjoy. The recommended water-to-coffee ratio is 1:1.
Tips and precautions for using the AeroPress:
1. Don't use too fine a grind: because the AeroPress is not an espresso machine, nor a moka pot. The AeroPress relies on the force of your body pressing down to filter the coffee, which is not enough to produce crema, so don't fall into the myth that "there must be crema";
2. Using a metal filter can increase Crema;
3. The coffee scoop included with the AeroPress is about 1.5 times larger than a standard coffee scoop sold separately. (One level scoop is about 14g);
4. If you like stronger coffee, you can use two level scoops of coffee beans with the included AeroPress scoop and add hot water up to the 4 mark. If you prefer it milder, use one scoop and likewise fill water to the 4 mark.
5. It's fine if the hot water temperature is a bit higher—after all, even though office hot water dispensers are labeled 100°C, the actual temperature rarely reaches 90°C. If you're using a kettle to boil water, though, let it sit for a minute or two before brewing to avoid scalding the coffee grounds and making it bitter.
6. When adding water, you can pour in two stages. First pour to about the 2 mark, stir to release the gases from the coffee expanding with heat, and after the water level drops, do the second pour up to your desired height.
7. For the vessel catching the coffee, it's best to use a thick cup or a stainless steel cup—at least if it slips and tips over during pressing, you're less likely to be cut by thin glass. It's also recommended to press with one hand and steady the vessel at the bottom with the other, otherwise it really could become a "tragedy." If you find pressing too strenuous, don't force it—avoid injury. Switch to a coarser setting and try again, or you can wet the rubber seal ring or squeeze out the air before pressing (applicable to the inverted method);
8. After brewing, open the black filter cap directly and push the coffee grounds out in one motion. Then use a little soap to clean the opening, and then remove the plunger. This can save you a lot of cleaning time.
9. After cleaning, you don't need to wait for all the parts to dry completely before reassembling. I'm used to reassembling all the components first, then leaving the AeroPress in a cool, shaded place to air dry. This way, firstly, you won't lose any parts, and secondly, you'll avoid parts deforming. The key point is that the AeroPress material is quite good—even after not using it for a long time, it won't stink like a French press or metal filter. Never store the plunger and chamber separately, because they will deform over time. Always keep the plunger and chamber connected, which helps extend the equipment's lifespan. Also, never leave the rubber plunger in the sun, as this can easily cause the rubber to deteriorate.
Based on the AeroPress principle, we can make slight modifications to change the coffee's flavor. And there are many ways to play:
1. Change the water-to-coffee ratio.
This is very intuitive and can change the strength.
2. Grind size
Finer coffee grounds will have a higher extraction ratio. This often results in a more acidic taste.
But if too fine, it may pass through the paper filter, making the mouthfeel less clean.
3. Change from one filter to multiple filters
This can filter out more particles.
4. Pressing time
This is the process that generates pressure. If the time is longer, more extraction occurs per unit of time.
5. Steeping duration
The longer the time, the more substances dissolve. But more isn't necessarily better—it may bring more off-flavors. Of course, if the coffee isn't fresh, sometimes a longer steep is necessary.
Some materials are sourced from the internet, compiled and edited by Coffee's Country.
The above content is compiled by CoffeeHunters, a coffee news website.


