








How does a latte art tutorial cover heart, rosetta and tulip?
A latte art tutorial that moves from basics to advanced patterns starts with milk steaming and incorporation. Pouring milk from a higher position while circling mixes it with the espresso and evens the texture. From there, the heart, layered heart, leaf, tulip and swan are built step by step, covering pour point, flow rate, turning the cup back and the finishing motion.
Incorporation reduces the density gap between espresso and milk foam, so later pours blend smoothly. The cup surface is divided into three points to make pour positions easier to learn. Beginners can start with the heart, while advanced practice focuses on the layered heart, rosetta and swan. Each pattern depends on steady flow control and returning the cup to level at the right moment.
Want to make coffee shop-level latte art at home? This tutorial will take you from the basics to the advanced level. The article first emphasizes the importance of steaming milk foam and points out that incorporation is the key step that determines whether the texture of milk coffee is even. Then, we break down the specific techniques for five classic patterns—heart, layered heart, leaf, tulip, and swan. From choosing the pouring point, controlling the flow, to the timing of turning the cup back and the finishing motion, every step is explained in detail. Whether you are a beginner just starting out or an advanced player trying to break through a plateau, you can find practical tips and practice directions here.

After practicing milk steaming diligently every day, I believe everyone has now become able to steam milk foam with a suitable texture. For those who have not yet mastered it, why not first click "Front Street Coffee's link" to learn the basic key points of milk steaming and build a solid foundation!
It is important to understand that incorporation plays a key role in the entire latte art process. It can reduce the density difference between the coffee and the milk foam, allowing the milk poured afterward to fully blend with the espresso, ultimately producing a cup of milk coffee with a harmonious texture.
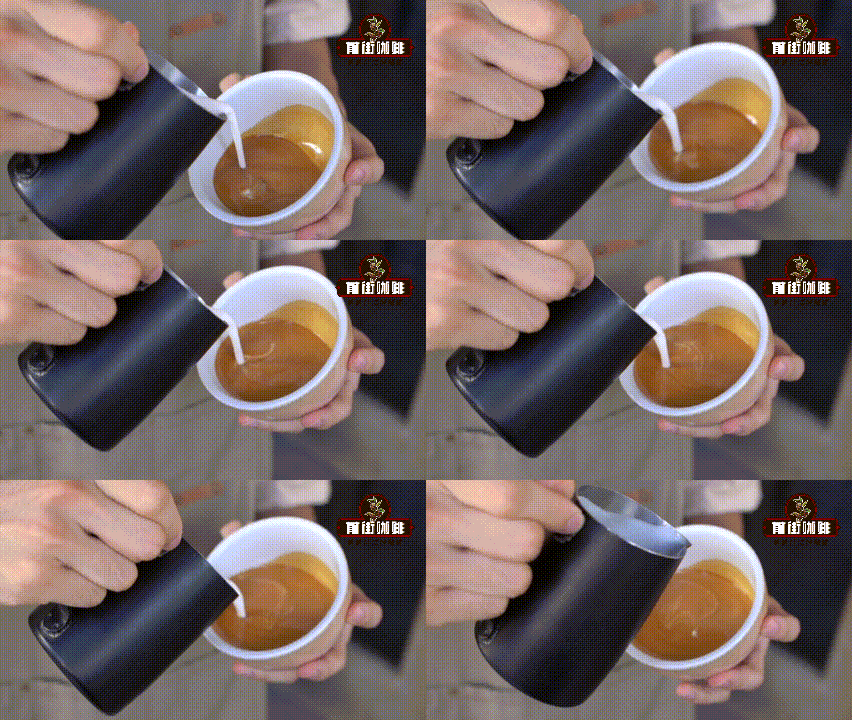
The specific method of incorporation: place the milk pitcher at a higher position above the liquid surface, and pour the milk while drawing circles. The purpose of drawing circles is to keep the settled espresso and the poured milk constantly stirring and mixing, thereby achieving incorporation.

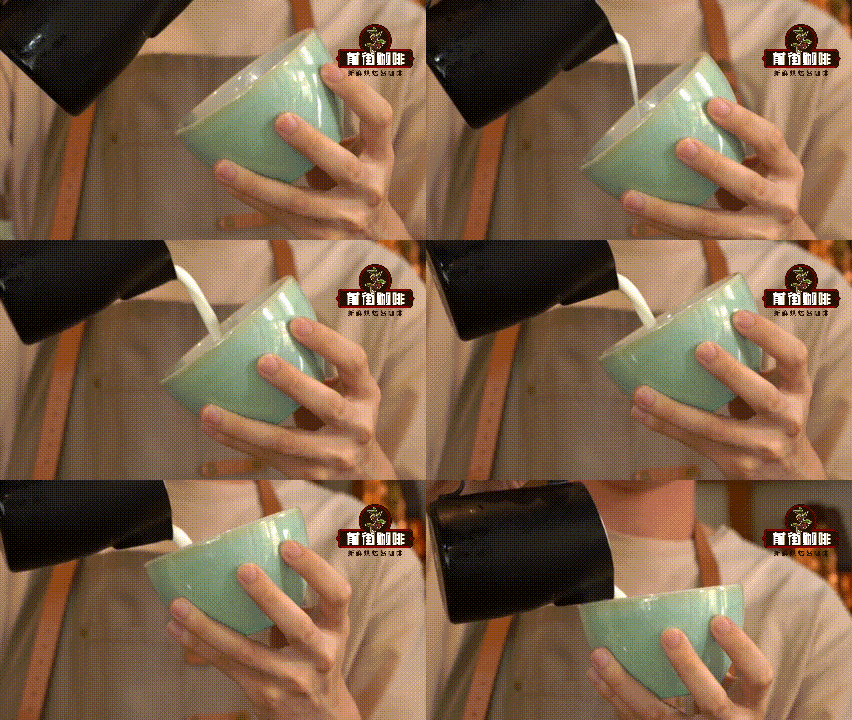
Turning the cup back refers to the hand holding the cup gradually returning the cup to a horizontal state as the latte art pattern is being made. This has two benefits: first, it maintains the proper pouring distance, making the pattern easier to form; second, it prevents the coffee from spilling out of the cup.
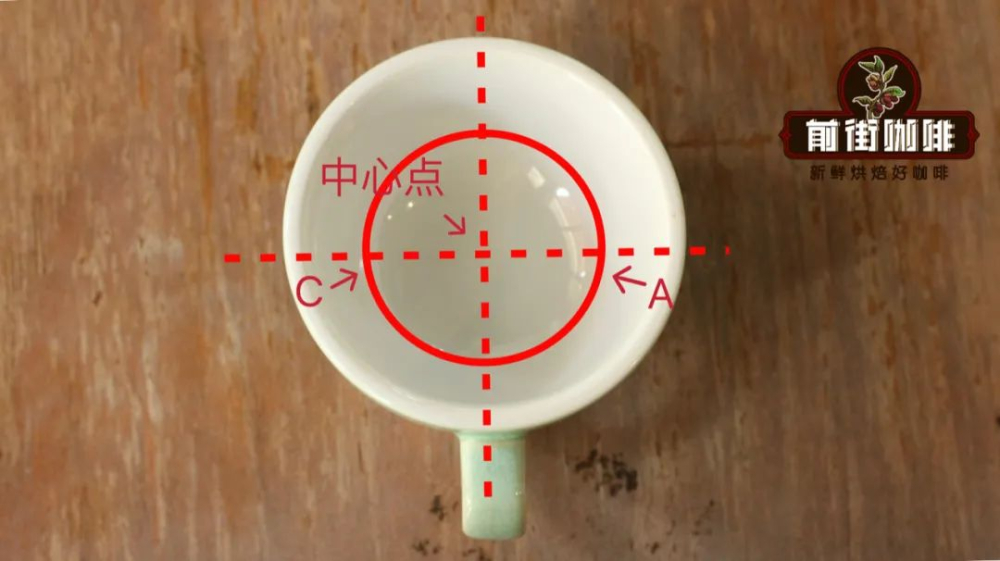
To make it easier for everyone to understand where the milk is poured in the subsequent latte art process, we first divide the cup surface into three points.
So now, let's formally enter the latte art teaching section!
Heart
This pattern is the easiest for beginners to pick up, but for experienced hands it is actually the hardest to do well!
Pour espresso into the cup and prepare milk in the milk pitcher. First incorporate, and when the cup is half full, lower the height of the milk pitcher, aim the spout at the center point, bring it close to the liquid surface, tilt the pitcher, and pour with a larger stream. While pouring milk, slowly turn the cup back and adjust, and when it is nine-tenths full, raise the milk pitcher to finish.
Layered Heart
As with the heart, first incorporate until the cup is half full, move the spout to the center point, and likewise pour the milk with a larger stream. The difference is that this time you need to move the spout back and forth; a slow and even motion will create a layered, stacked effect in the pattern. When it is nine-tenths full, raise the milk pitcher to finish.
Leaf
When incorporated to half a cup, move the spout to point C, pour the milk with a larger stream, and at the same time move the milk pitcher back and forth while slowly moving it backward, retreating all the way to point A and pausing briefly so the leaf tip flows out. After reaching nine-tenths full, raise the milk pitcher to finish.
Tulip
Incorporate to half a cup, then push out half a heart at the center point, then another half heart, then move back one step, continue pushing out half a heart, and repeat this operation until it is nine-tenths full, then raise the pitcher to finish. The variation method for a layered tulip is to replace the half hearts in the tulip with half layered hearts.
Swan
First incorporate to half full, then pour a leaf without finishing, raise the milk pitcher and reduce the flow, push forward and press toward the edge of the leaf, and after pressing to the bottom, pull backward; when pulling to above point A, lower the spout and pause for a moment, then raise the pitcher to finish and complete the pattern!
The above content is compiled by CoffeeHunters, a coffee news website.


