








What does latte milk to coffee ratio have to do with latte art?
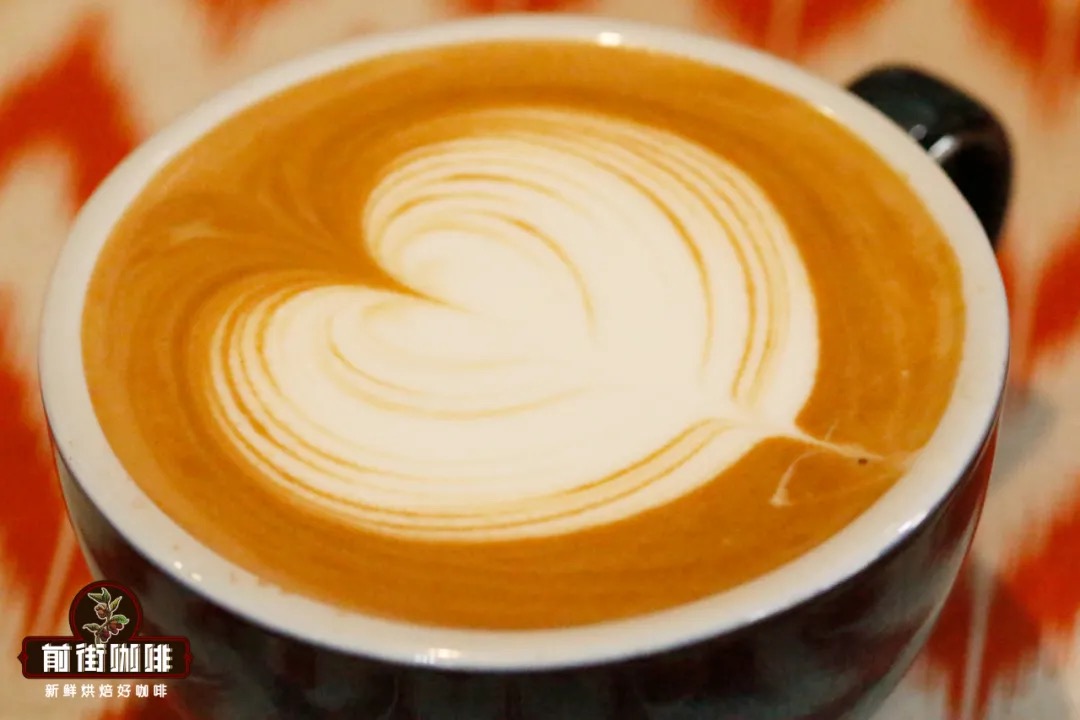
Latte art depends on four things: a rich espresso with proper crema, fresh milk steamed into fine foam of moderate thickness, an evenly blended surface in the cup, and steady pouring technique. The heart is the basic pattern to learn first. Bean freshness controls crema: stale beans give thin crema, while very fresh beans release too much carbon dioxide and produce thick, rough crema that disrupts the pour.
The latte milk to coffee ratio also matters, since too much milk leaves too little crema and surface contrast for a pattern to hold. Aim for a moderate foam thickness and fine texture, then pour evenly so the milk integrates with the espresso before the pattern forms. Watch the wrist motion, keep the pitcher steady, and the shape appears as the surface rises.
Watching a barista gently sway their wrist as delicate patterns emerge in the cup—the whole process is both soothing and enviable. But when it's your turn to try, forget a heart shape—you can't even form a white dot. Actually, latte art isn't some exclusive magic reserved for baristas. As long as you grasp a few key points, you can make beautiful latte art at home too. This article will systematically explain four dimensions: crema, milk foam, integration, and pattern formation, along with detailed steps for the basic heart pattern—perfect for every coffee enthusiast who wants to level up.

For more specialty coffee knowledge, please follow: Front Street Coffee (Frontsteet Coffee)
Watch a barista holding the cup in one hand and the pitcher in the other, wrist swaying rhythmically, and various beautiful patterns gradually appear in the cup—the whole scene is quite soothing. But once you try it yourself, forget a heart shape—you can't even produce a white dot. Is this really just the exclusive skill of seasoned baristas?
Master the following key points, and latte art isn't that far out of reach!
Setting aside how much of a pick-me-up latte can be, a latte with latte art is absolutely guaranteed to lift your mood. Whether it's a simple heart or a complex combination pattern, these latte art creations that look like magic all depend on a few basic conditions: crema a rich and smooth espresso, fresh milk steamed into milk foam of moderate thickness and fine texture, an evenly blended coffee surface, the small techniques of pattern formation, and a calm heart.
/ Rich and smooth espresso with abundant crema
Front Street believes that no matter which extraction method is used, the freshness of the coffee beans is crucial. During roasting, coffee beans produce carbon dioxide. After roasting ends, depending on storage method and number of days, the carbon dioxide continues to release until depleted, and the carbon dioxide content in the beans directly affects the formation of espresso crema.
Beans that aren't fresh naturally produce thin crema, but beans that are too fresh have too much carbon dioxide, causing the crema to be overly thick and rough. In this case, the flow of milk foam in the coffee liquid is affected, which ultimately impacts the evenness of integration and the smoothness of pattern formation.
To get an espresso with just the right crema, we recommend using Front Street Classic Espresso Blend. This blend combines beans from three origins—Brazil, Indonesia, and Vietnam—and uses a dark roast to maximize the coffee's rich aroma, making it easy for everyone to extract rich, dense crema. It's suitable for both Americano diluted with water and latte paired with milk. You can purchase it at the Front Street Taobao store or the Front Street Tmall flagship store.
/ Steam fresh milk into milk foam that is neither too thick nor too thin, but smooth and fine
To make milk foam sufficiently stable, the milk used for steaming must contain adequate protein and milk fat. The sterilization process of fresh milk better preserves its protein and milk fat, while the abundant lactose in fresh milk gives the milk a better sweetness after heating. The whey protein in milk protein forms a thin film that traps air when the steam and milk surface come into contact and mix, creating bubbles; casein creates surface tension where the bubbles meet the liquid surface, making the bubbles more stable and less likely to burst. Milk fat further stabilizes the milk foam and enhances the milk's viscosity (body).
To steam milk foam of moderate thickness that is smooth and fine, the key is controlling the time the steam wand is in contact with and mixing the milk surface—this step is called the aeration phase. For latte, the aeration time is only 2 to 3 seconds. During aeration, place the steam wand 1cm below the milk surface. Open the steam and after hearing four "squeaks," adjust the steam wand to 2-3cm below the surface and adjust the angle of the milk pitcher to create a vortex—this step is called the heating phase, which raises the temperature while making the foam finer and smoother. The final latte should have a milk foam thickness of about 1cm.
/ Even integration of espresso and milk
Even integration of coffee and milk isn't just for the latte art pattern—more importantly, it enhances the taste and flavor of the coffee. So don't dismiss this as nagging—even integration is really, really important! Before integrating, shake the milk pitcher to blend the foam and milk evenly to prevent separation. When integrating, pay attention to the flow rate of the milk foam—the thickness of the pour should be about the size of a regular drinking straw.
When pouring, keep the pitcher at a height of 5-8cm, and hold the coffee cup steady at a 45-degree angle. When starting to integrate, whether you're circling the coffee cup or the milk pitcher, maintain a continuous and steady flow of milk foam—no stopping and starting.
During integration, make the coffee surface rotate in the cup to increase its fluidity. Try not to pour toward the edge of the cup. If white foam appears on the surface, continue pouring foam into that spot to integrate it, which can push the white foam below the coffee surface. After integration is complete, the coffee surface should be clean and uniform in color, otherwise it will affect the subsequent latte art pattern.
/ Tips for forming latte art patterns
Taking the most basic heart pattern as an example, when the milk and coffee are integrated to about 70% full, you can lower the milk pitcher and start creating the pattern. The technique for pattern formation is: when the milk foam flows onto the coffee surface, simultaneously adjust the angle of the cup so the foam flows into the cup along the adjusted angle. In other words, no matter what pattern you're making, to get the milk foam to appear on the coffee surface, you must pour while gradually straightening the cup (⚠️: not straightening the cup all at once).
When integrated to 70% full, lower the milk pitcher close to the cup and start pouring from the center of the surface. As your left hand straightens the coffee cup, your right hand increases the flow rate and sways the pitcher left and right at a steady speed (not vibrating). You'll see the milk foam float on top, slowly forming a circle that gradually expands. When the cup is nearly at a 180° angle, the foam circle has taken shape (be careful not to lift while pushing forward). Use the downward force of the stream to push the upper layer of coffee down, and you'll see the circle develop a heart-shaped notch, with the streams from both sides converging toward the center.

When you feel the heart is full enough and the coffee surface is almost full, you can lift the milk pitcher, draw the milk stream to its thinnest, and drag it forward across the entire pattern to finish the heart! (⚠️: After dragging across the pattern, immediately cut off the flow—don't continue pouring foam after dragging through, or the pattern will deform due to the gravity from the continued flow.)
/ A calm heart
Haste makes waste—only with a steady mindset can you do something well. Making latte art can't be rushed; this process requires constant practice. Whether it's espresso extraction, milk steaming, or the way you hold the pitcher (portal), all of these ultimately affect the formation of the pattern. When you start getting frustrated during practice, you should stop and rest. Numb practice will only make your form more unstable, and may even make you resent latte art.
The above content is compiled by CoffeeHunters, a coffee news website.


