







Street Coffee Latte Art: Pouring Hearts and Leaves
Latte art comes down to two core actions: incorporation and drawing. The dividing line between them is the height of the pitcher spout above the liquid surface. A high spout sends milk foam straight into the coffee to mix, while a spout held almost against the surface leaves white lines on the brown crema. Most pours incorporate until the cup is half full, then switch to drawing.
Getting a decent-looking pattern can take a day when form is good, or two to three days on average. Difficult combination patterns take longer because they require understanding the underlying principles first, then repeated practice. Key details include height control, cup rotation timing, force, and the offset of the landing point, as seen in common street coffee bar pours of hearts, leaves, and tulips.
Latte art is the reason many people first step into the world of coffee, but how long does it actually take to master? In this article, Front Street Coffee shares the core principles and practical details of latte art, starting from the two main actions of incorporation and drawing, breaking down key elements such as height control, timing of cup rotation, application of force, offset of the landing point, and finishing techniques, and offering four practical practice tips to help enthusiasts avoid detours and quickly get the hang of basic patterns like hearts, leaves, and tulips, and even take on more difficult combination patterns.



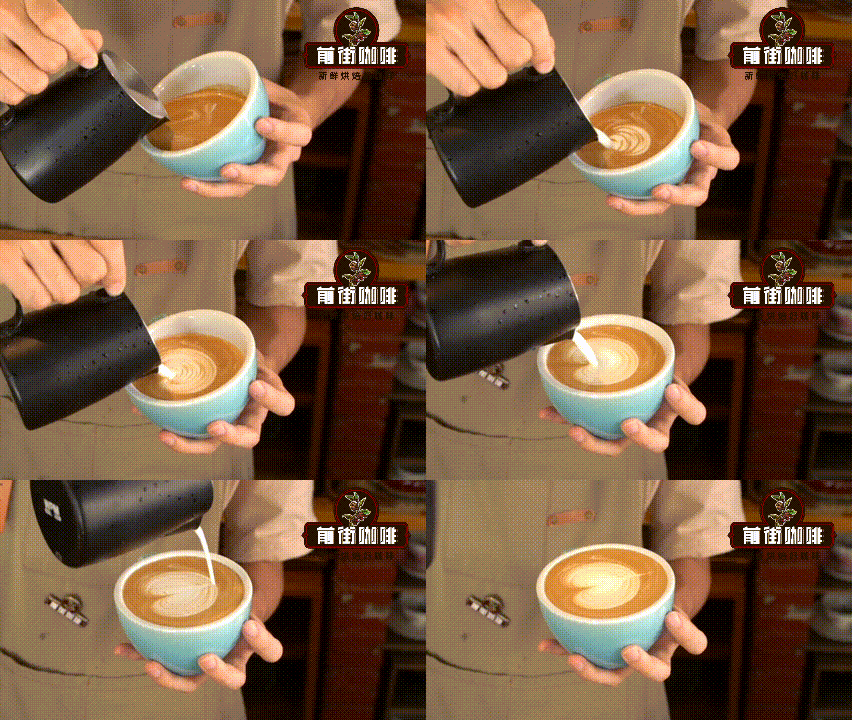

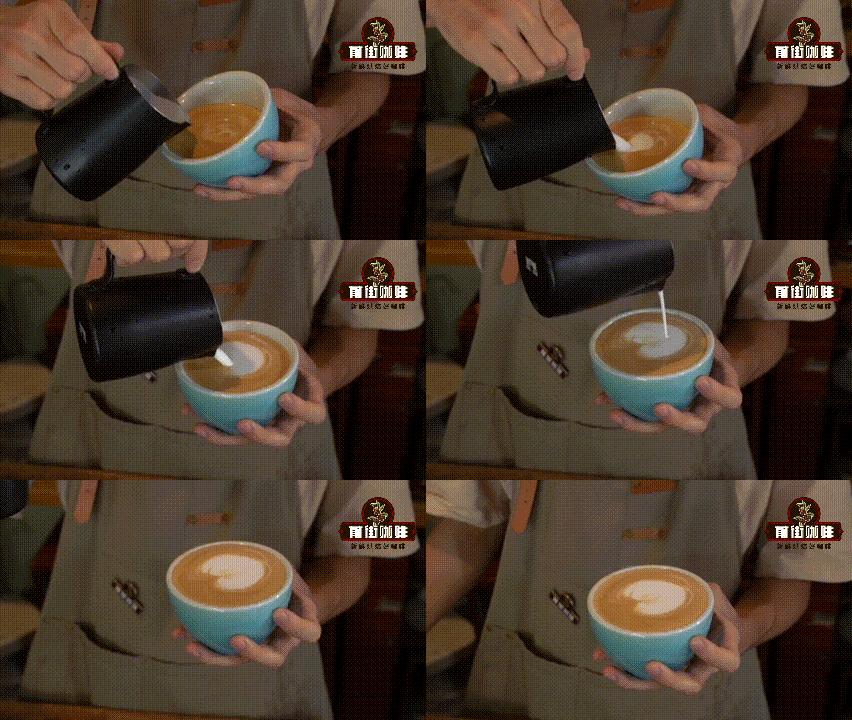


Latte art has drawn many people who originally had no interest in coffee into this circle, with a clear goal—to one day effortlessly draw beautiful, delicate patterns. So how long do you actually need to practice to master latte art?
To be honest, latte art is not as mysterious as everyone thinks. If the goal is just to make a decent-looking pattern, you can get it done in a day when you are in good form; even on an average day, two or three days at most will do.
But if you want to take on difficult combination patterns, you first need to understand the principles behind them, then pair that with repeated practice, and reaching the effect you expect is not far away.
Next, Front Street will talk about the underlying logic of latte art and some details that are easily overlooked, hoping to help everyone get started faster. For how to steam milk foam, please refer to the related content in "How to Steam Milk Foam."
The basic principle of pouring a pattern
The core actions of latte art are only two: incorporation and drawing. The dividing line between them lies in the height of the pitcher spout above the liquid surface when pouring the milk foam.
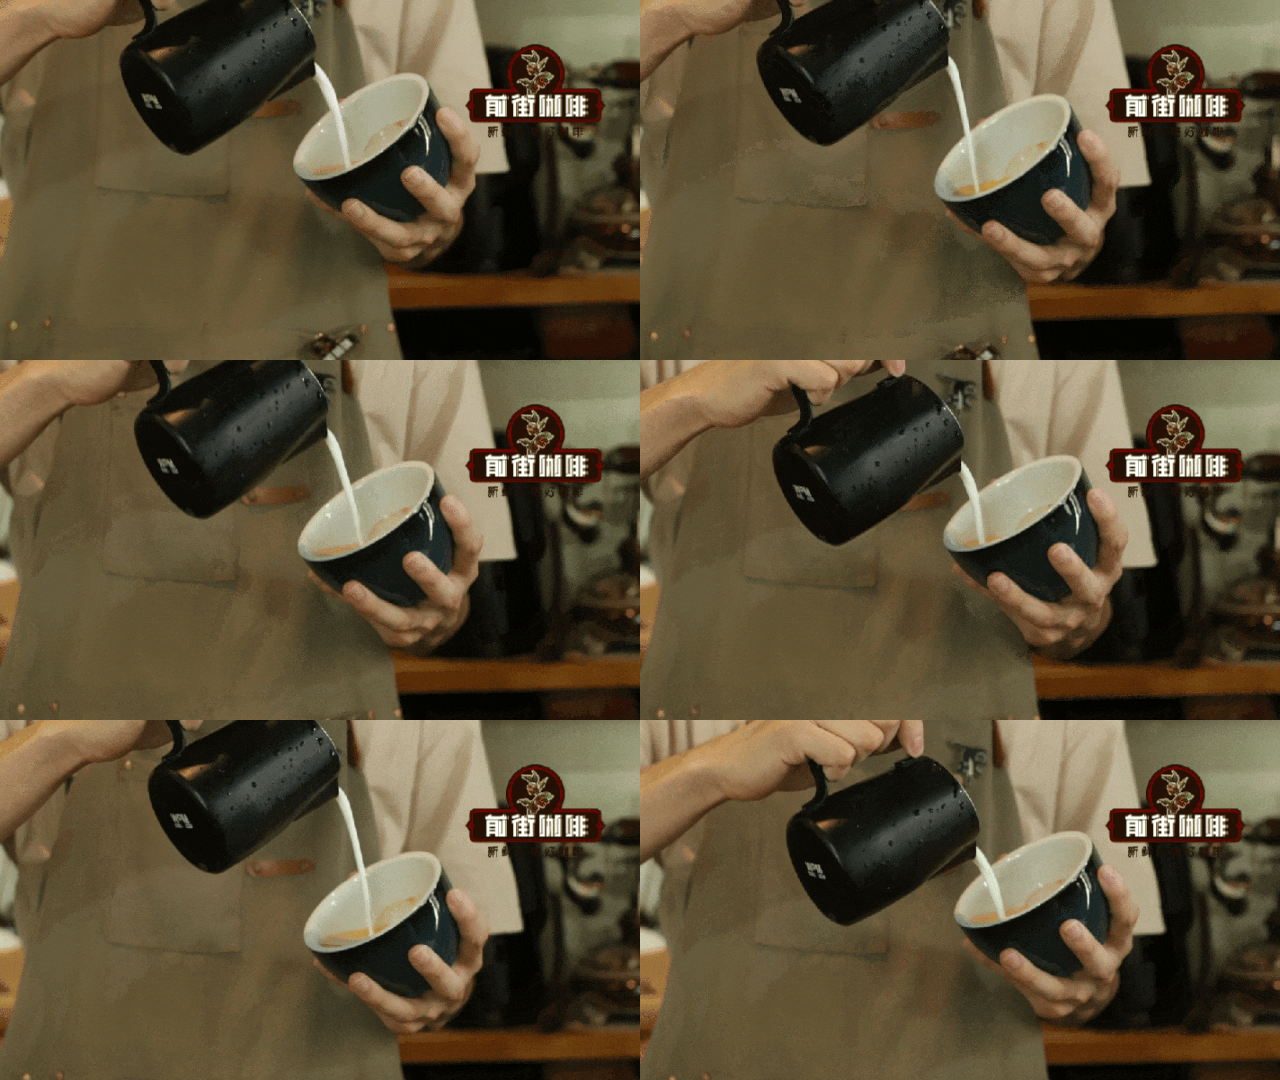
When the spout of the latte pitcher keeps a relatively high distance from the liquid surface, the milk foam rushes directly into the coffee and mixes with it—this is "incorporation."
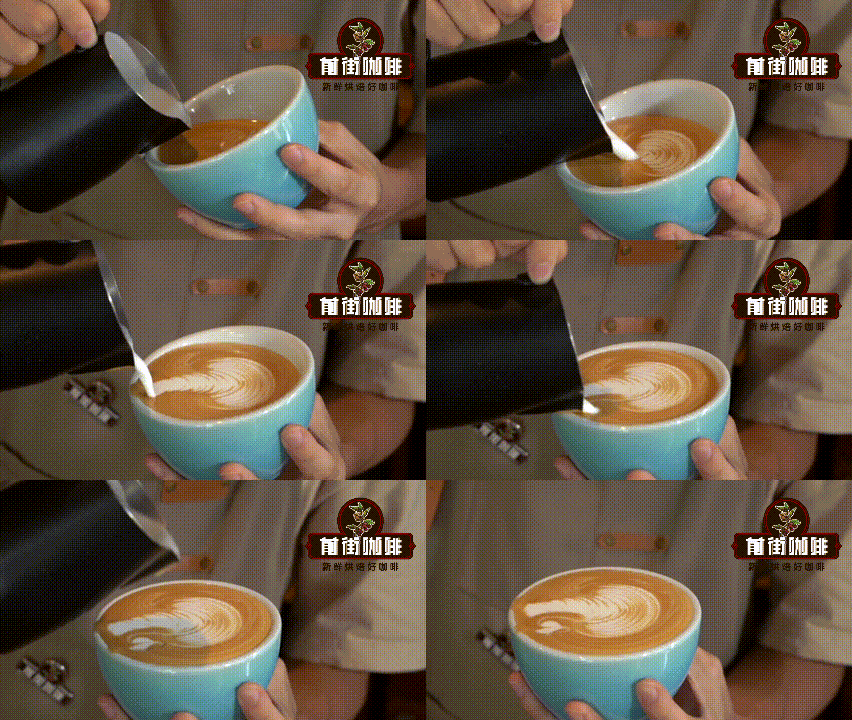
When the pitcher spout pours the milk foam almost against the liquid surface, white lines will emerge on the brown crema on the surface of the coffee along with the pouring force—this is "drawing."
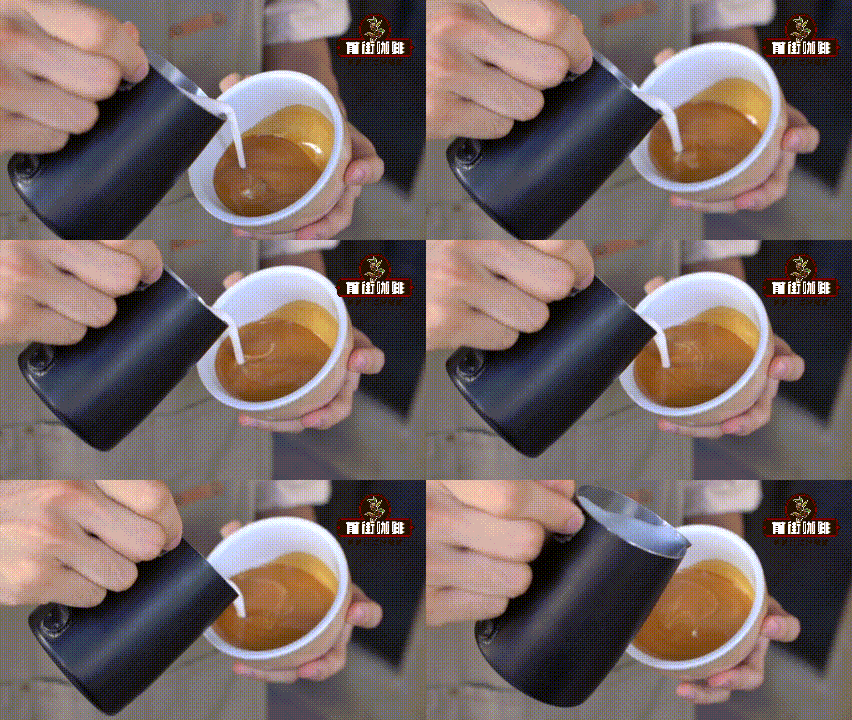
Generally speaking, we first incorporate the coffee and milk until the cup is half full, and then start drawing. On one hand, this allows the milk and coffee to fully combine; on the other hand, a half-cup volume is also more conducive to forming the pattern.
Key techniques for incorporation
Incorporation is not just holding the milk pitcher high up and casually swirling it a couple of times. If you do not want the liquid surface after incorporation to look as awful as a white shirt splattered with stains, height control must be taken seriously.
(The picture shows a liquid surface like a "white shirt with stains")
A common incorporation technique is: hold the cup with one hand and the pitcher with the other, with the two hands offset by half a turn and moving in opposite circular motions. The key is to keep the incorporation height between 5 and 10 centimeters, while coordinating with a slightly stronger up-and-down stirring motion, so that the liquid surface basically will not develop messy streaks.
Key techniques for drawing
Now for the most core part, drawing. At this point the coffee in the cup has already reached half capacity, and next comes the time to pour the pattern. There are four points to master one by one, and Front Street will explain them in detail for you.
Point one: during the drawing process, the right hand is responsible for controlling the flow of milk foam, while the left hand needs to coordinate by rotating the coffee cup. This action is usually called "cup rotation."
The timing of cup rotation is very particular—rotating too early makes it hard for the pattern to form, while rotating too late makes the coffee easy to spill. So when drawing, the first thing to practice is synchronizing both hands: while the right hand pours the milk foam, the left hand should make the corresponding cup-rotation movement according to the flow rate.
Point two: the greater the force when pouring the milk foam, the more milk foam flows out, and the streaks formed together with the shaking will also be thicker (the same effect occurs if the milk foam is steamed too thick); conversely, if the pouring force is smaller, the milk foam combined with shaking is more likely to form fine streaks with clear texture on the liquid surface (when the milk foam thickness is moderate, the streaks will be more distinct).
Point three: different patterns have different landing points. Usually, the final position of the latte art pattern you see will deviate somewhat from the landing point when drawing. For example, a heart-shaped latte art will ultimately appear in the center of the cup, so when drawing, the landing point should be moved slightly to the right of center (toward the side of the latte pitcher), because the movement of cup rotation and the push of the milk will both change the final position of the pattern.
Point four: the finish is extremely critical. A good finish is the finishing touch; a bad finish is gilding the lily. Even if the pattern was made beautifully before, if the height is not controlled during the finish, the entire carefully arranged pattern will collapse.
(The finish was not done well, causing the middle lines to be too thick and making the whole pattern unbalanced left and right)
So what Front Street wants to remind you is that when finishing, you must pay attention to controlling the height of the latte pitcher, and do not let the milk pitcher get too close to the liquid surface, so as not to leave extra "strokes." In addition, the finishing action should begin at the latest when the cup is nine-tenths full, otherwise the coffee can easily overflow because there is too much volume.
Practical tips for latte art practice
Tip one: this is what Front Street emphasizes—when you first start learning latte art, you might as well try it once or twice with real milk and real coffee, to personally experience what "live-fire" latte art feels like, and remember that resistance and feel. This will be very helpful later when practicing with dish soap and soy sauce. (Those with good conditions can of course also keep practicing with real milk and real coffee.)
Tip two: the core purpose of practice is to train the muscle memory of both hands. Do not rush to think about what pattern to make; instead, solidify the basics such as "the posture of holding the cup and gripping the pitcher, the technique of incorporation, the skill of cup rotation, and the details of drawing." The process may be a bit boring, but this is precisely the most important part. After practicing for one or two days, you can master the latte art techniques for basic figures.
Tip three: control the practice duration. Do not practice continuously for a long time, otherwise it is easy to become rigid in thinking and fatigued, and the effect will instead be worse. It is recommended to take a break every twenty minutes and think back on which details in the practice just now need improvement. This way you can get started faster.
Tip four: if you encounter something confusing, you can take a photo and then boldly message Front Street in the background or at the bottom of the article, and Front Street will give some suggestions.
A small detail that is easy to overlook
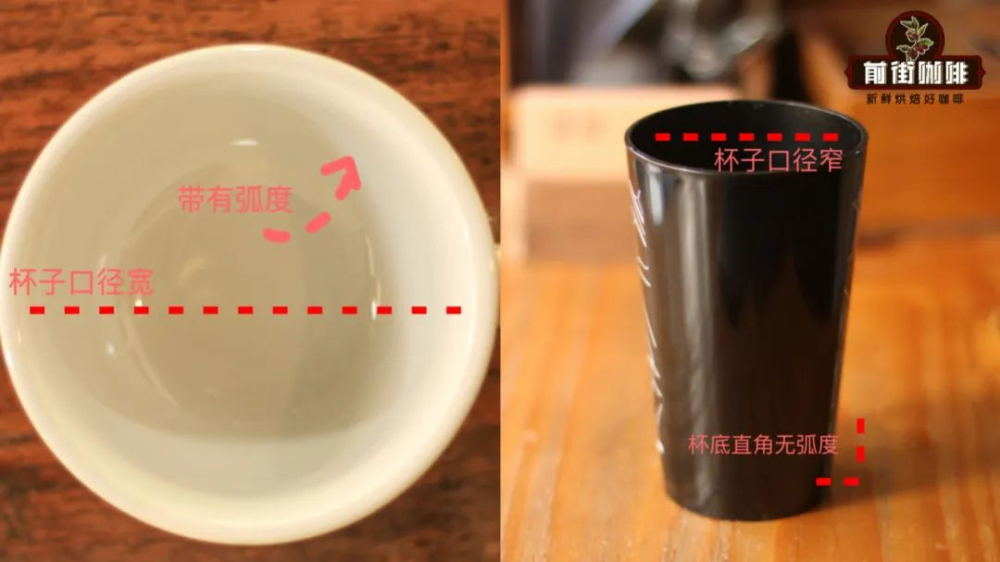
When you have learned the basic figures (heart, leaf, tulip) and are ready to advance to combination patterns, you might as well pay attention to the cup you are using. Many friends' latte art skills are actually already quite good, but because of the limitations of the coffee cup, their ability cannot be fully brought into play.
The wider the cup rim, the larger the area available for drawing; the smaller the cup rim, the smaller the drawing space. And the more curved the bottom of the cup, the more fully the poured milk and coffee incorporate. Simply put, cups with a large diameter and a curved bottom are more suitable for difficult latte art drawing. Alright, go ahead and try it now, and if there is anything you do not understand, ask Front Street at the front desk.
The above content is compiled by CoffeeHunters, a coffee news website.


